Clicking on any photo will give you a larger image
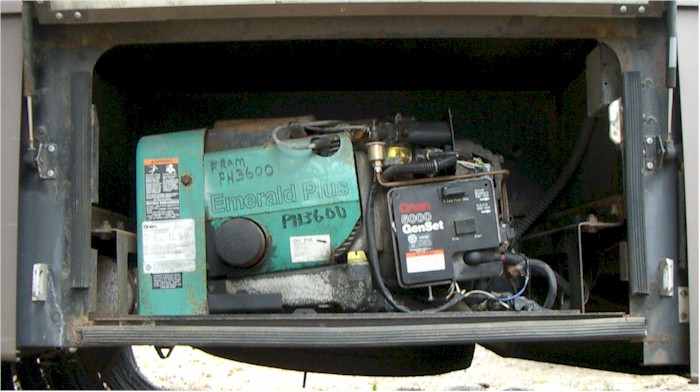
The old setup, before installing the
Generac. Gosh this thing was LOUD.
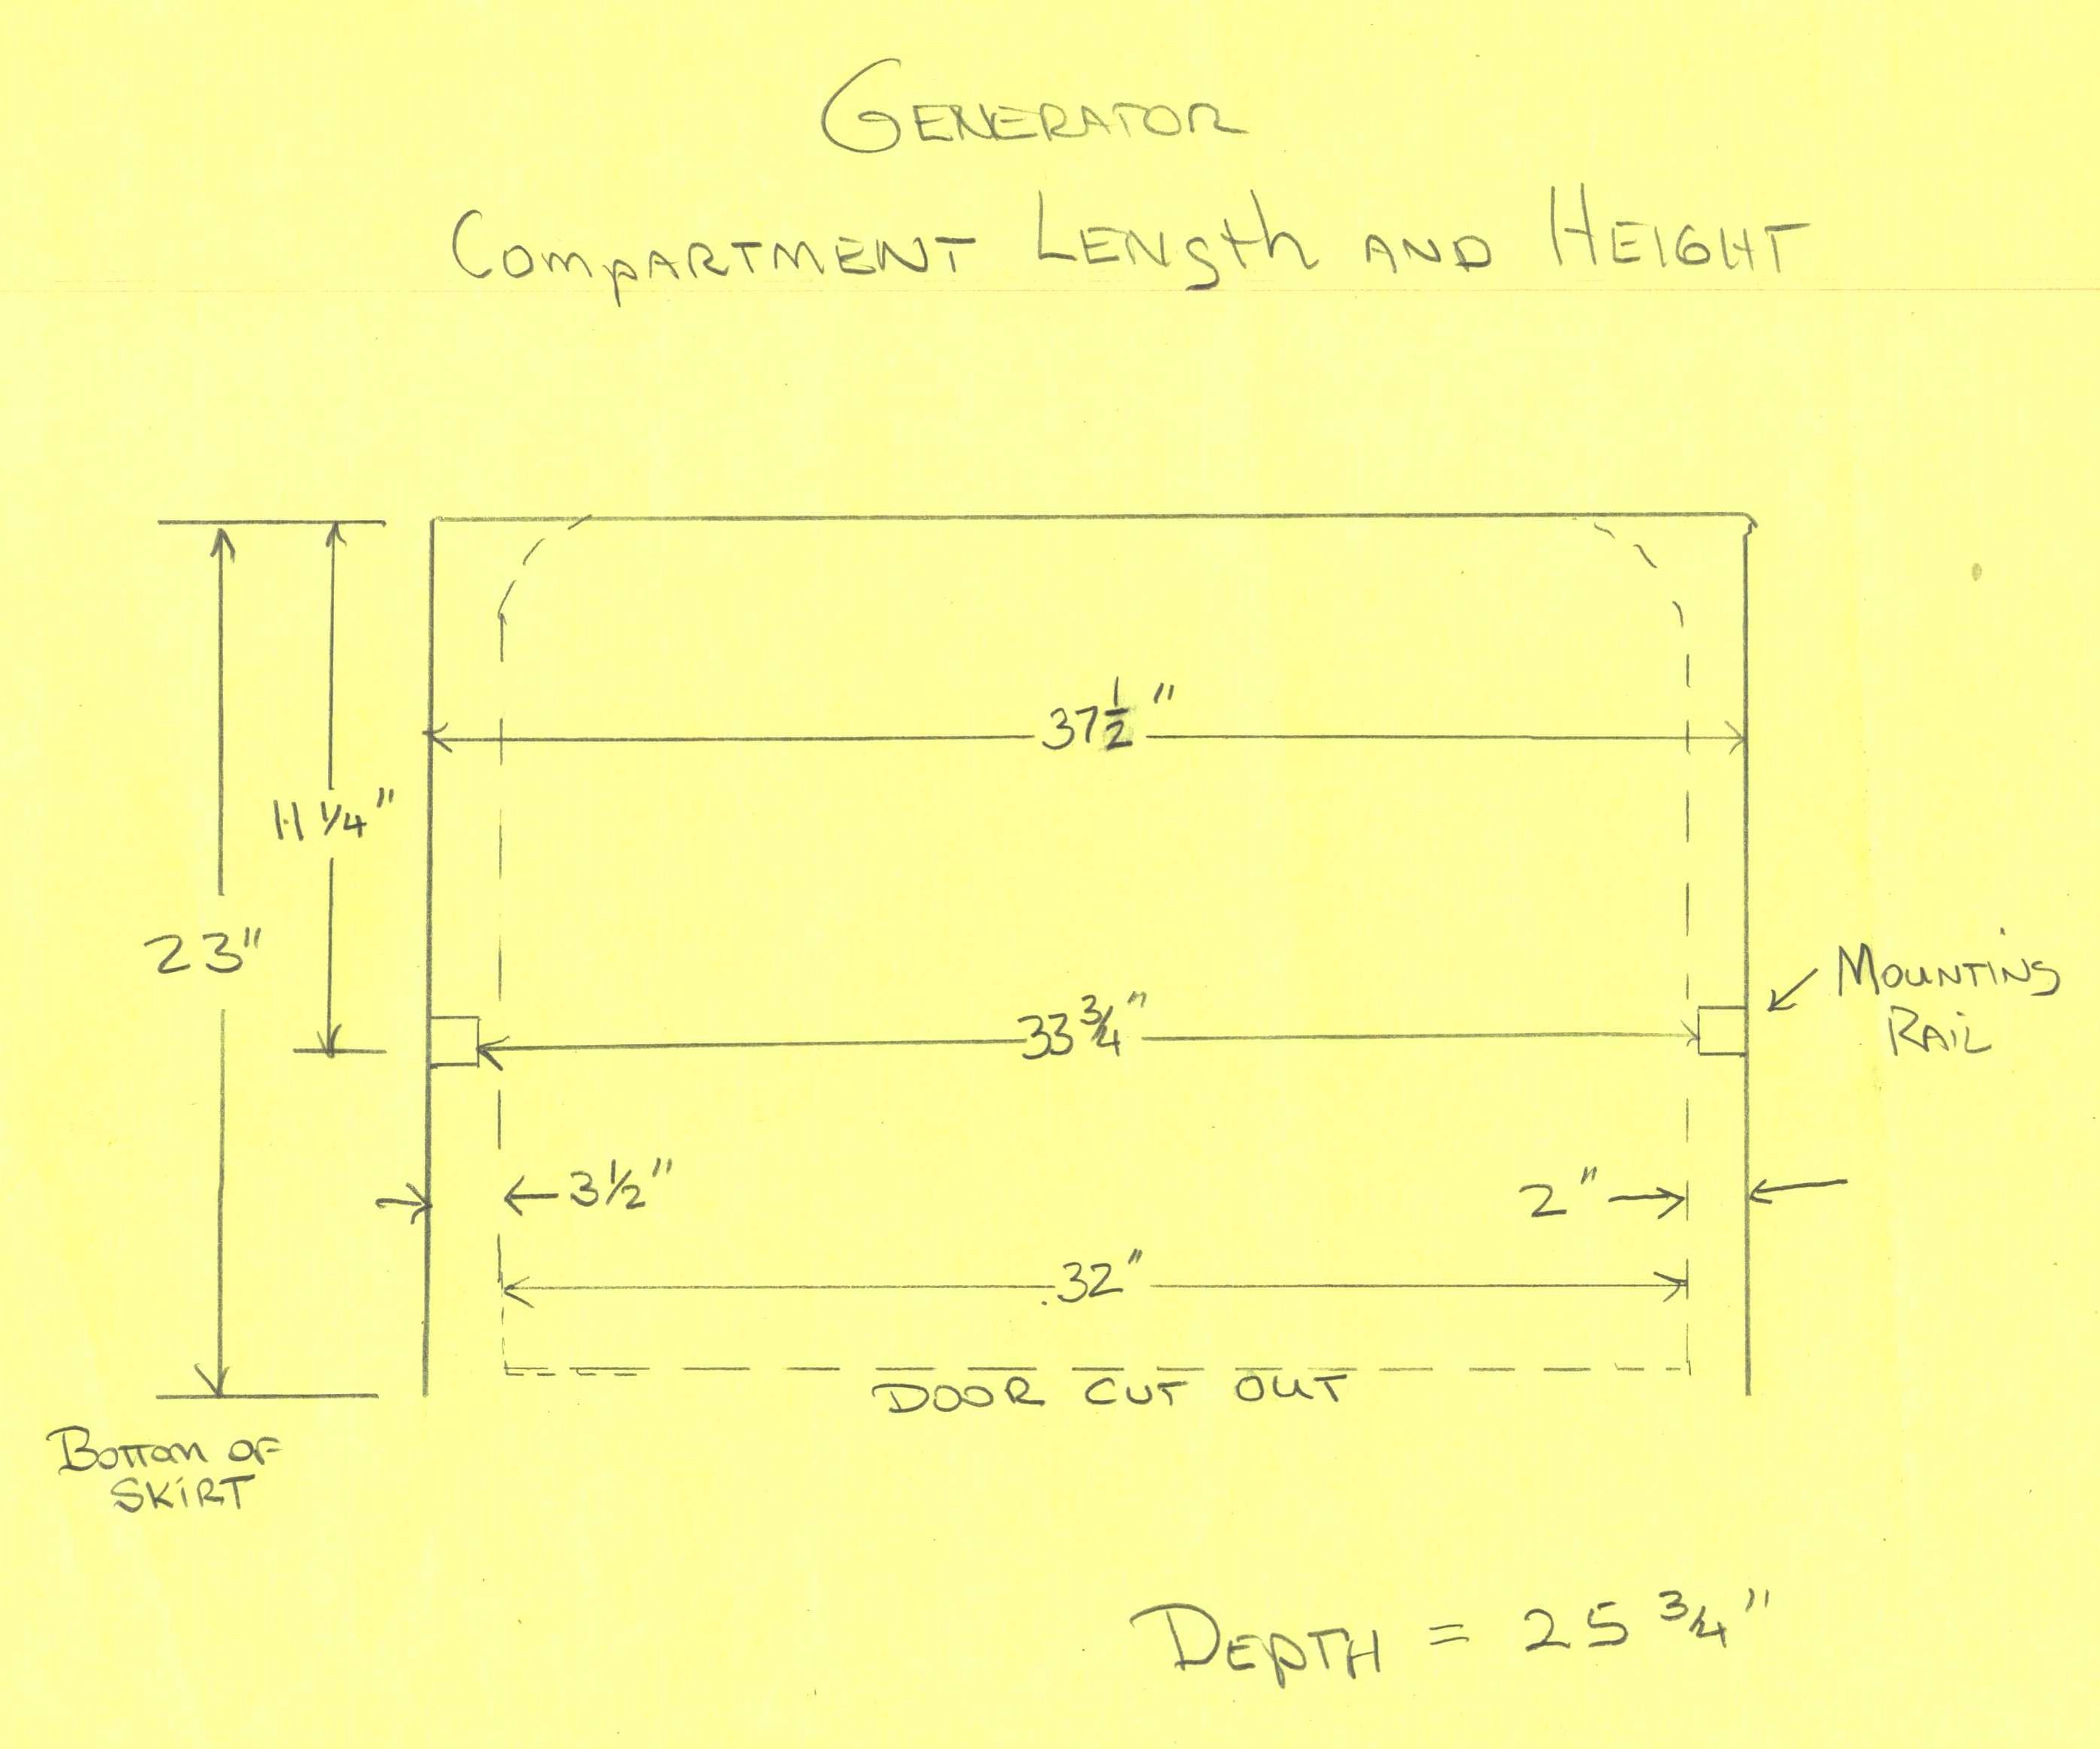
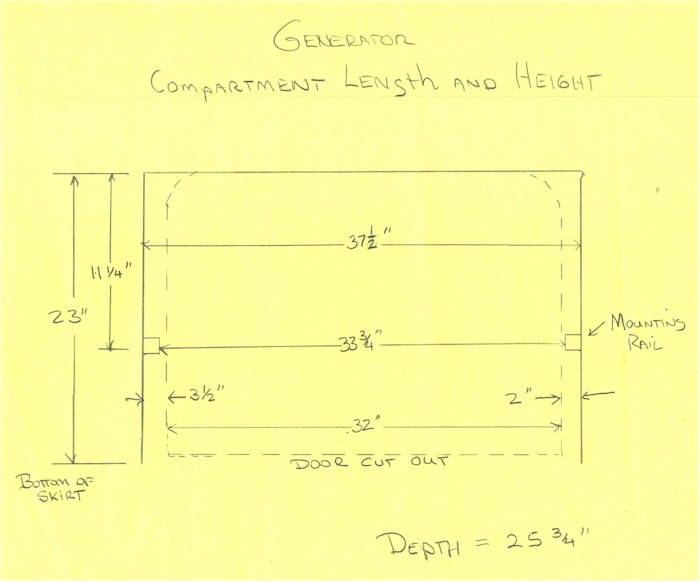
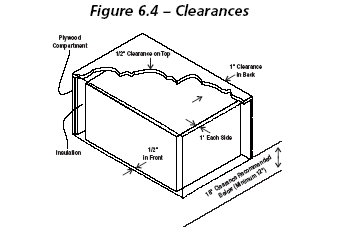
A diagram of the compartment (click for a
larger image):
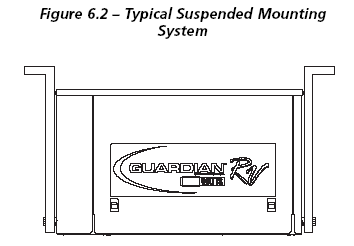
A view of the mounting taken from
Generac's excellent website and manual:
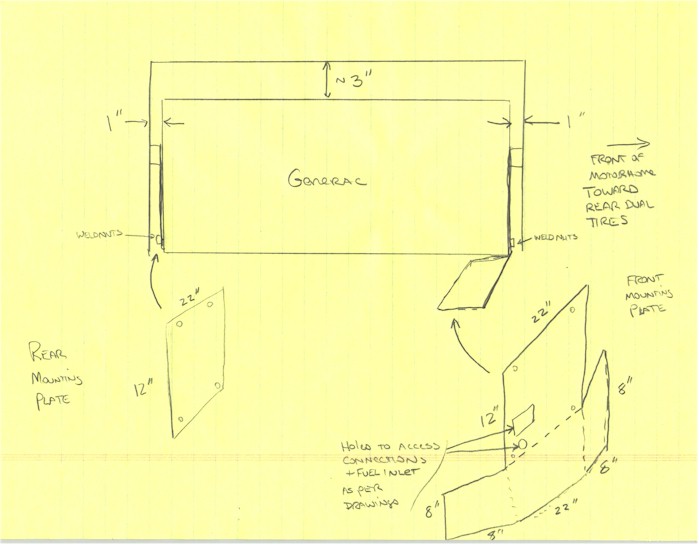
A view of the dimensions I will be working
with:
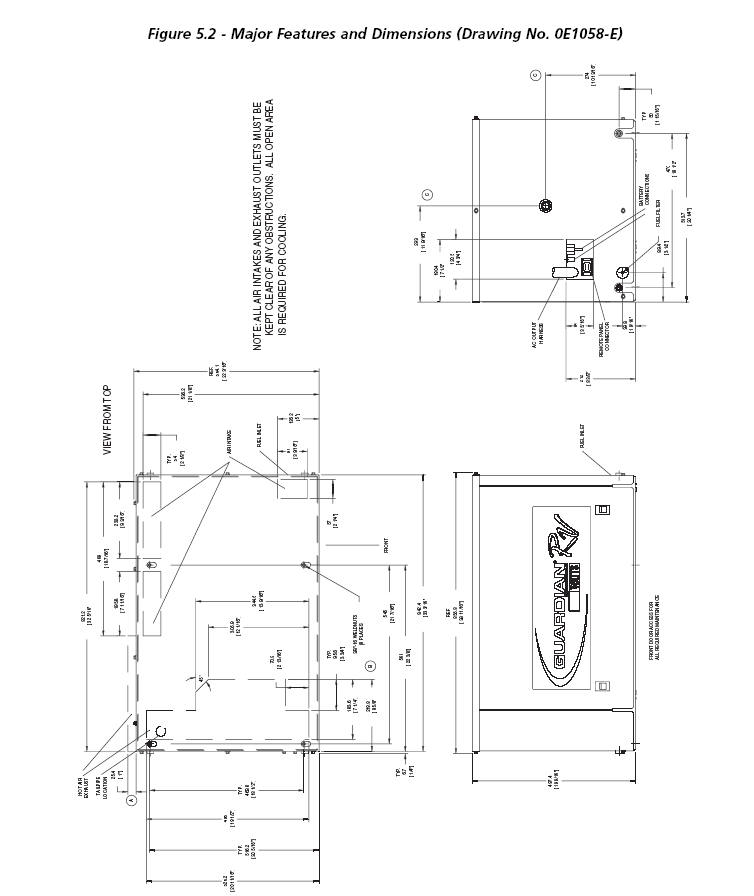
Air clearances are 1 inch back and sides and
1/2 inch top and front::
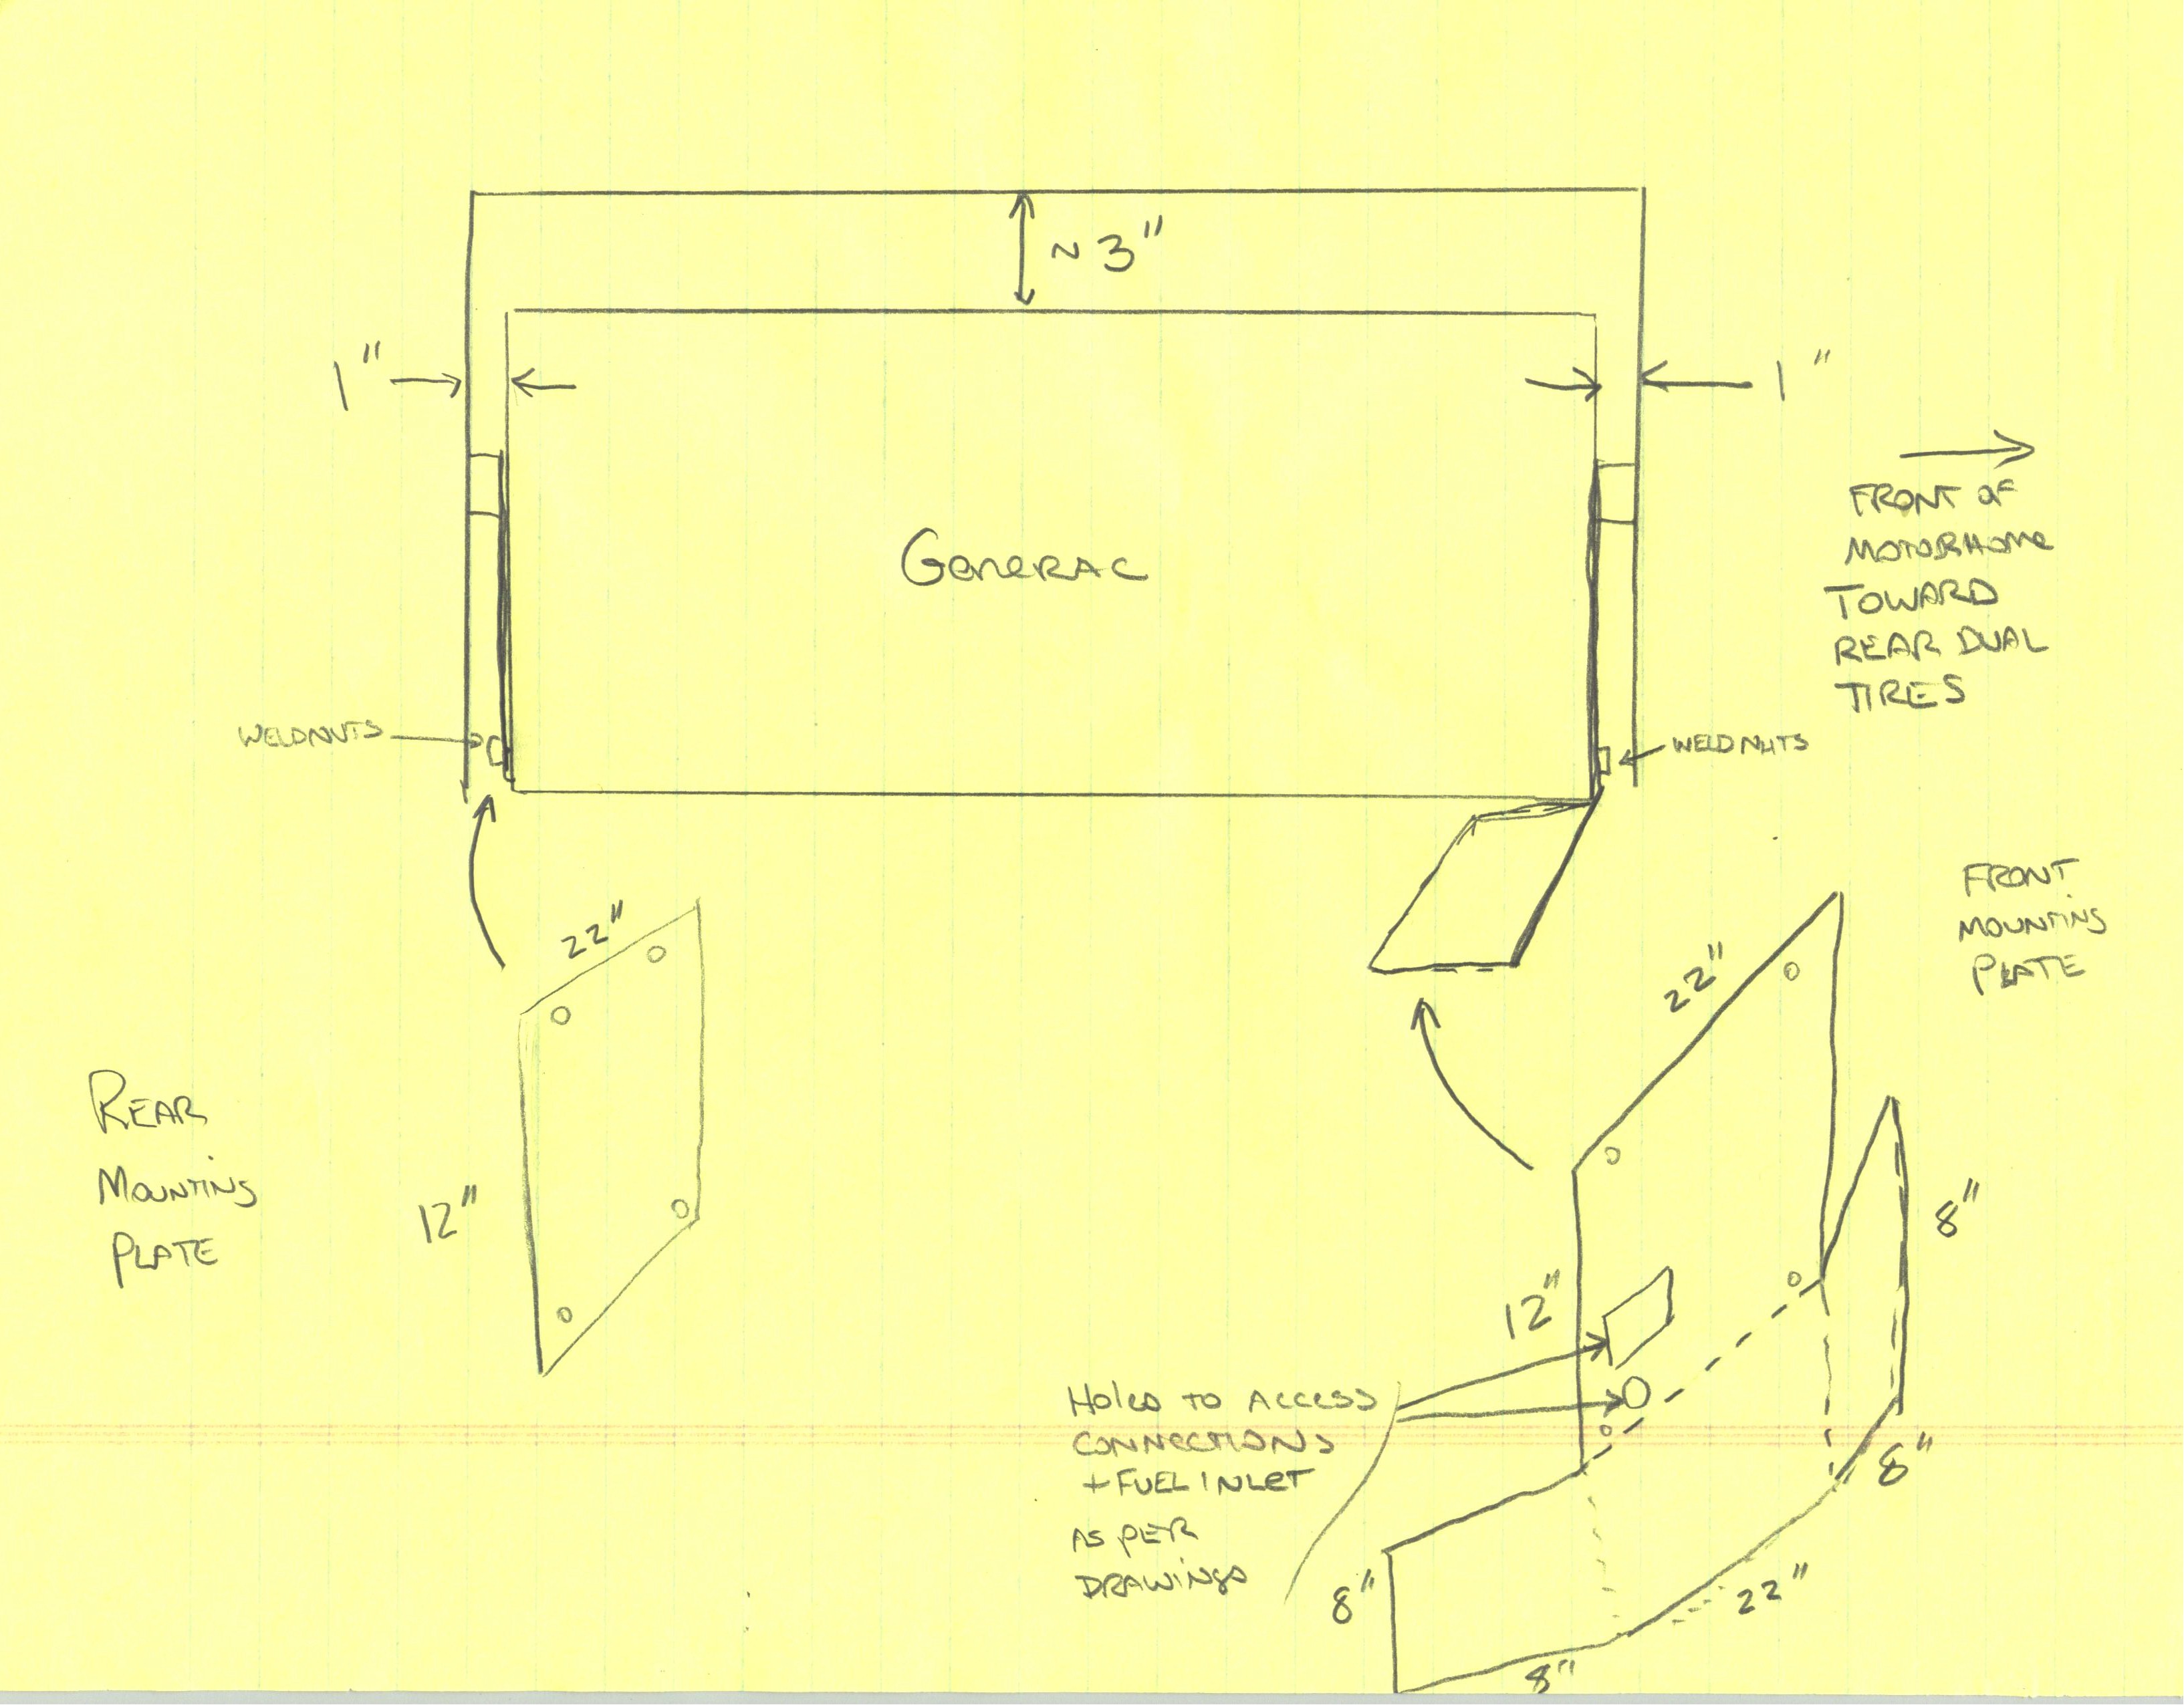
The original design for the mounting plates (click for a larger
image). I lost the wings on the bottom as I went with 10 gauge plates and
did not have the tools to cut and bend them.
 The
old generator was removed using two floor jacks and three people.
Use more floor jacks. It sucks when one jack goes sailing down before the
other. I built a platform that had casters that allowed me to wheel the
old one around for repair. The new one was on another platform. I
mounted two 10 gauge plates that were pre-drilled for the rails and the
generator mountings. We lifted the new generator with three floor jacks.
While the generator has proper clearances, there was NO clearance between the
mounting rails and the generator. We wiggled and pulled and pushed and
wiggled some more. Eventually it all came together. The
old generator was removed using two floor jacks and three people.
Use more floor jacks. It sucks when one jack goes sailing down before the
other. I built a platform that had casters that allowed me to wheel the
old one around for repair. The new one was on another platform. I
mounted two 10 gauge plates that were pre-drilled for the rails and the
generator mountings. We lifted the new generator with three floor jacks.
While the generator has proper clearances, there was NO clearance between the
mounting rails and the generator. We wiggled and pulled and pushed and
wiggled some more. Eventually it all came together.
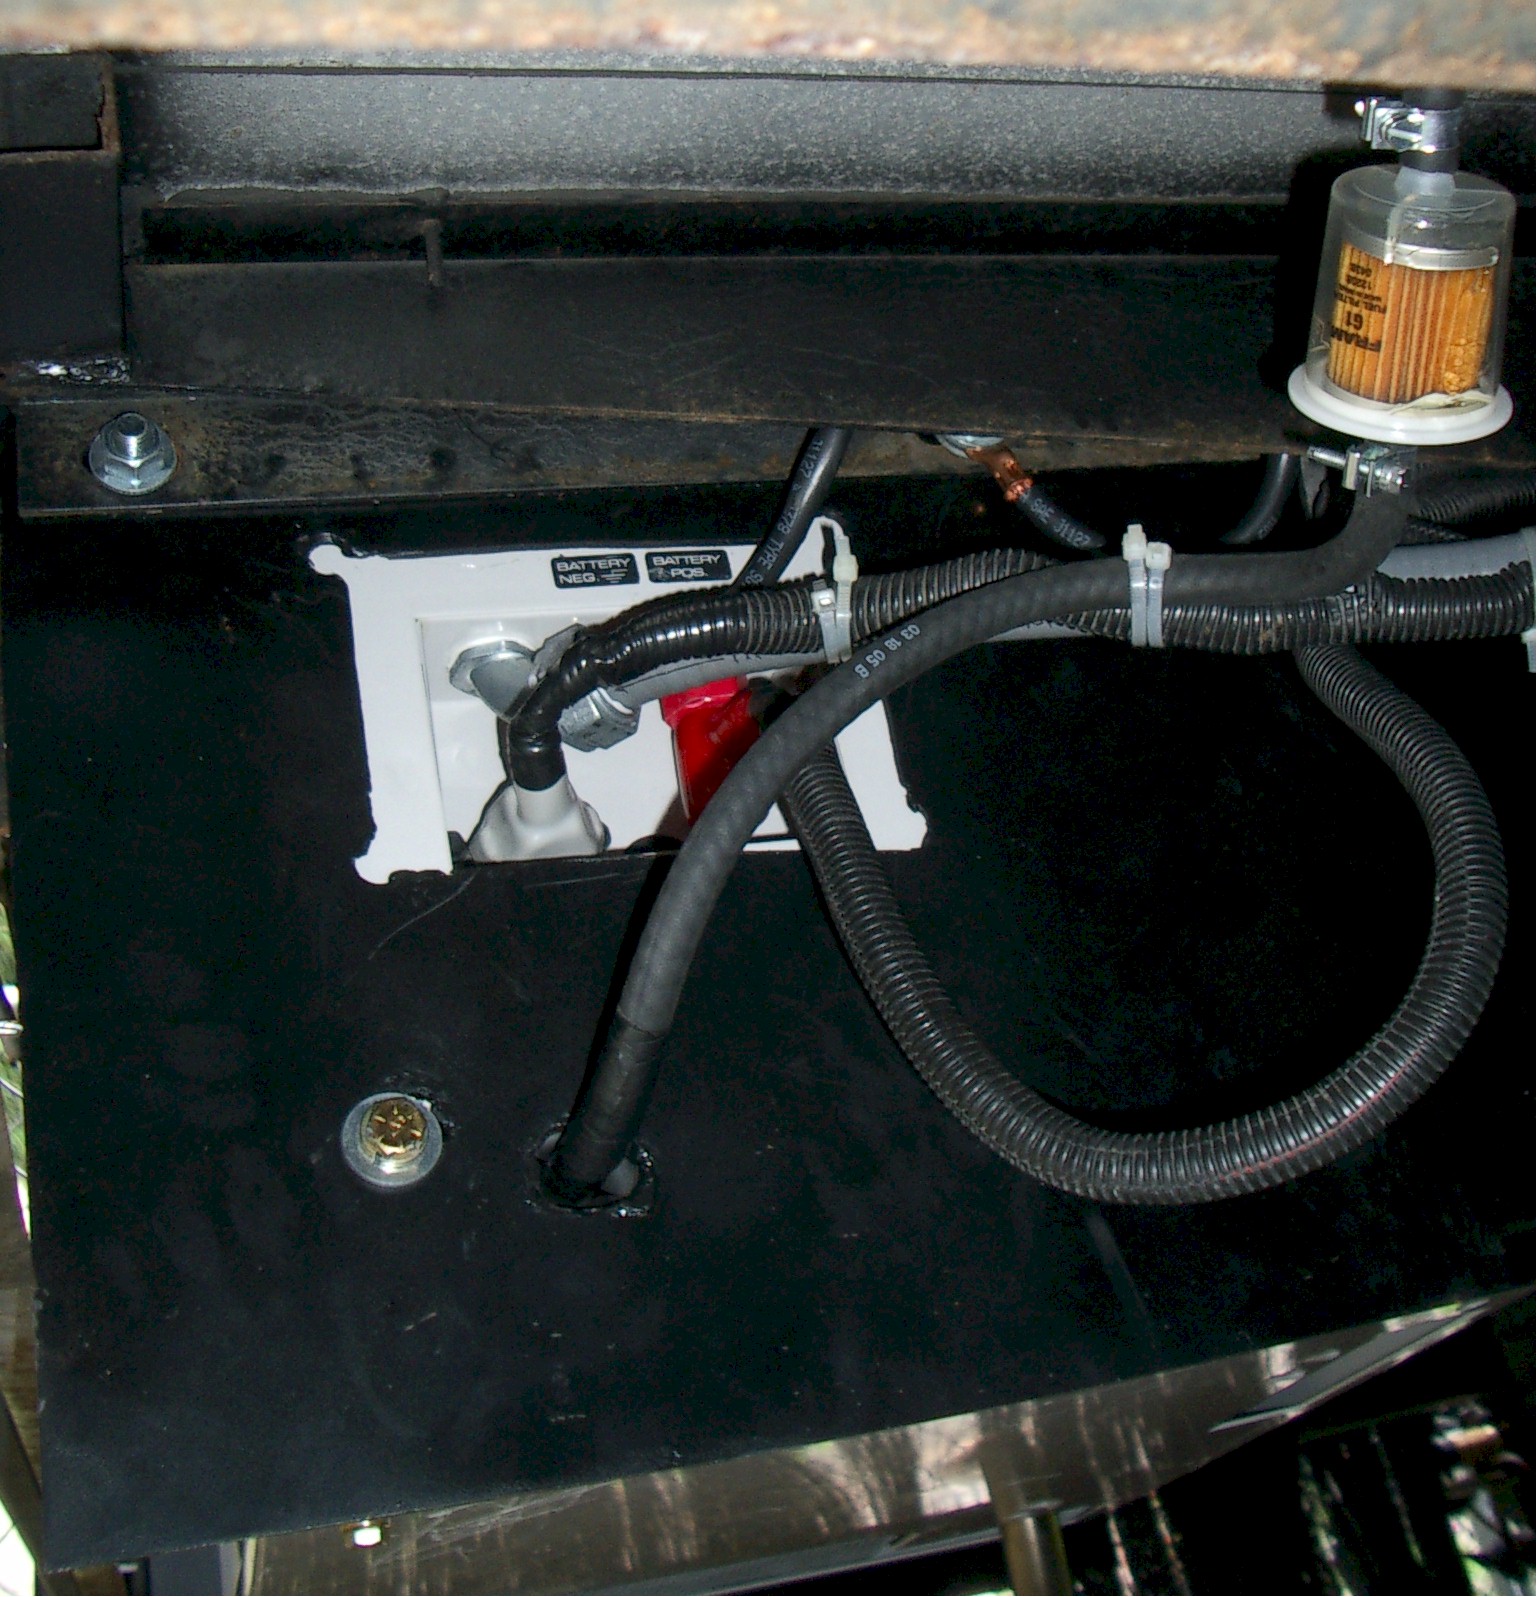
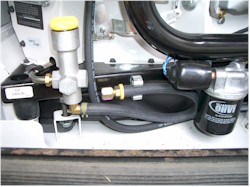
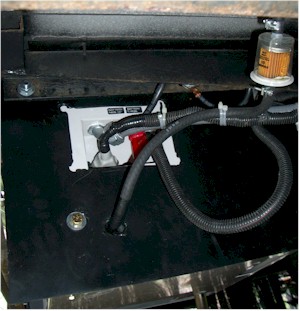 The
utilities are connected through a hole in the front plate. All are weather
sealed. The gas line has an auxiliary fuel filter. That will allow
me to separate the generator from the motorhome gas tank and feed it from an
outboard tank if required. Remember, we live in an area that already
suffered a multi-day blackout. Severe storms knock out power for days at a
time. While my 75 gallons (out of 100) should give me six or seven days, I
would prefer to be able to lengthen that as necessary. The
utilities are connected through a hole in the front plate. All are weather
sealed. The gas line has an auxiliary fuel filter. That will allow
me to separate the generator from the motorhome gas tank and feed it from an
outboard tank if required. Remember, we live in an area that already
suffered a multi-day blackout. Severe storms knock out power for days at a
time. While my 75 gallons (out of 100) should give me six or seven days, I
would prefer to be able to lengthen that as necessary.
The picture was taken looking up from the ground.
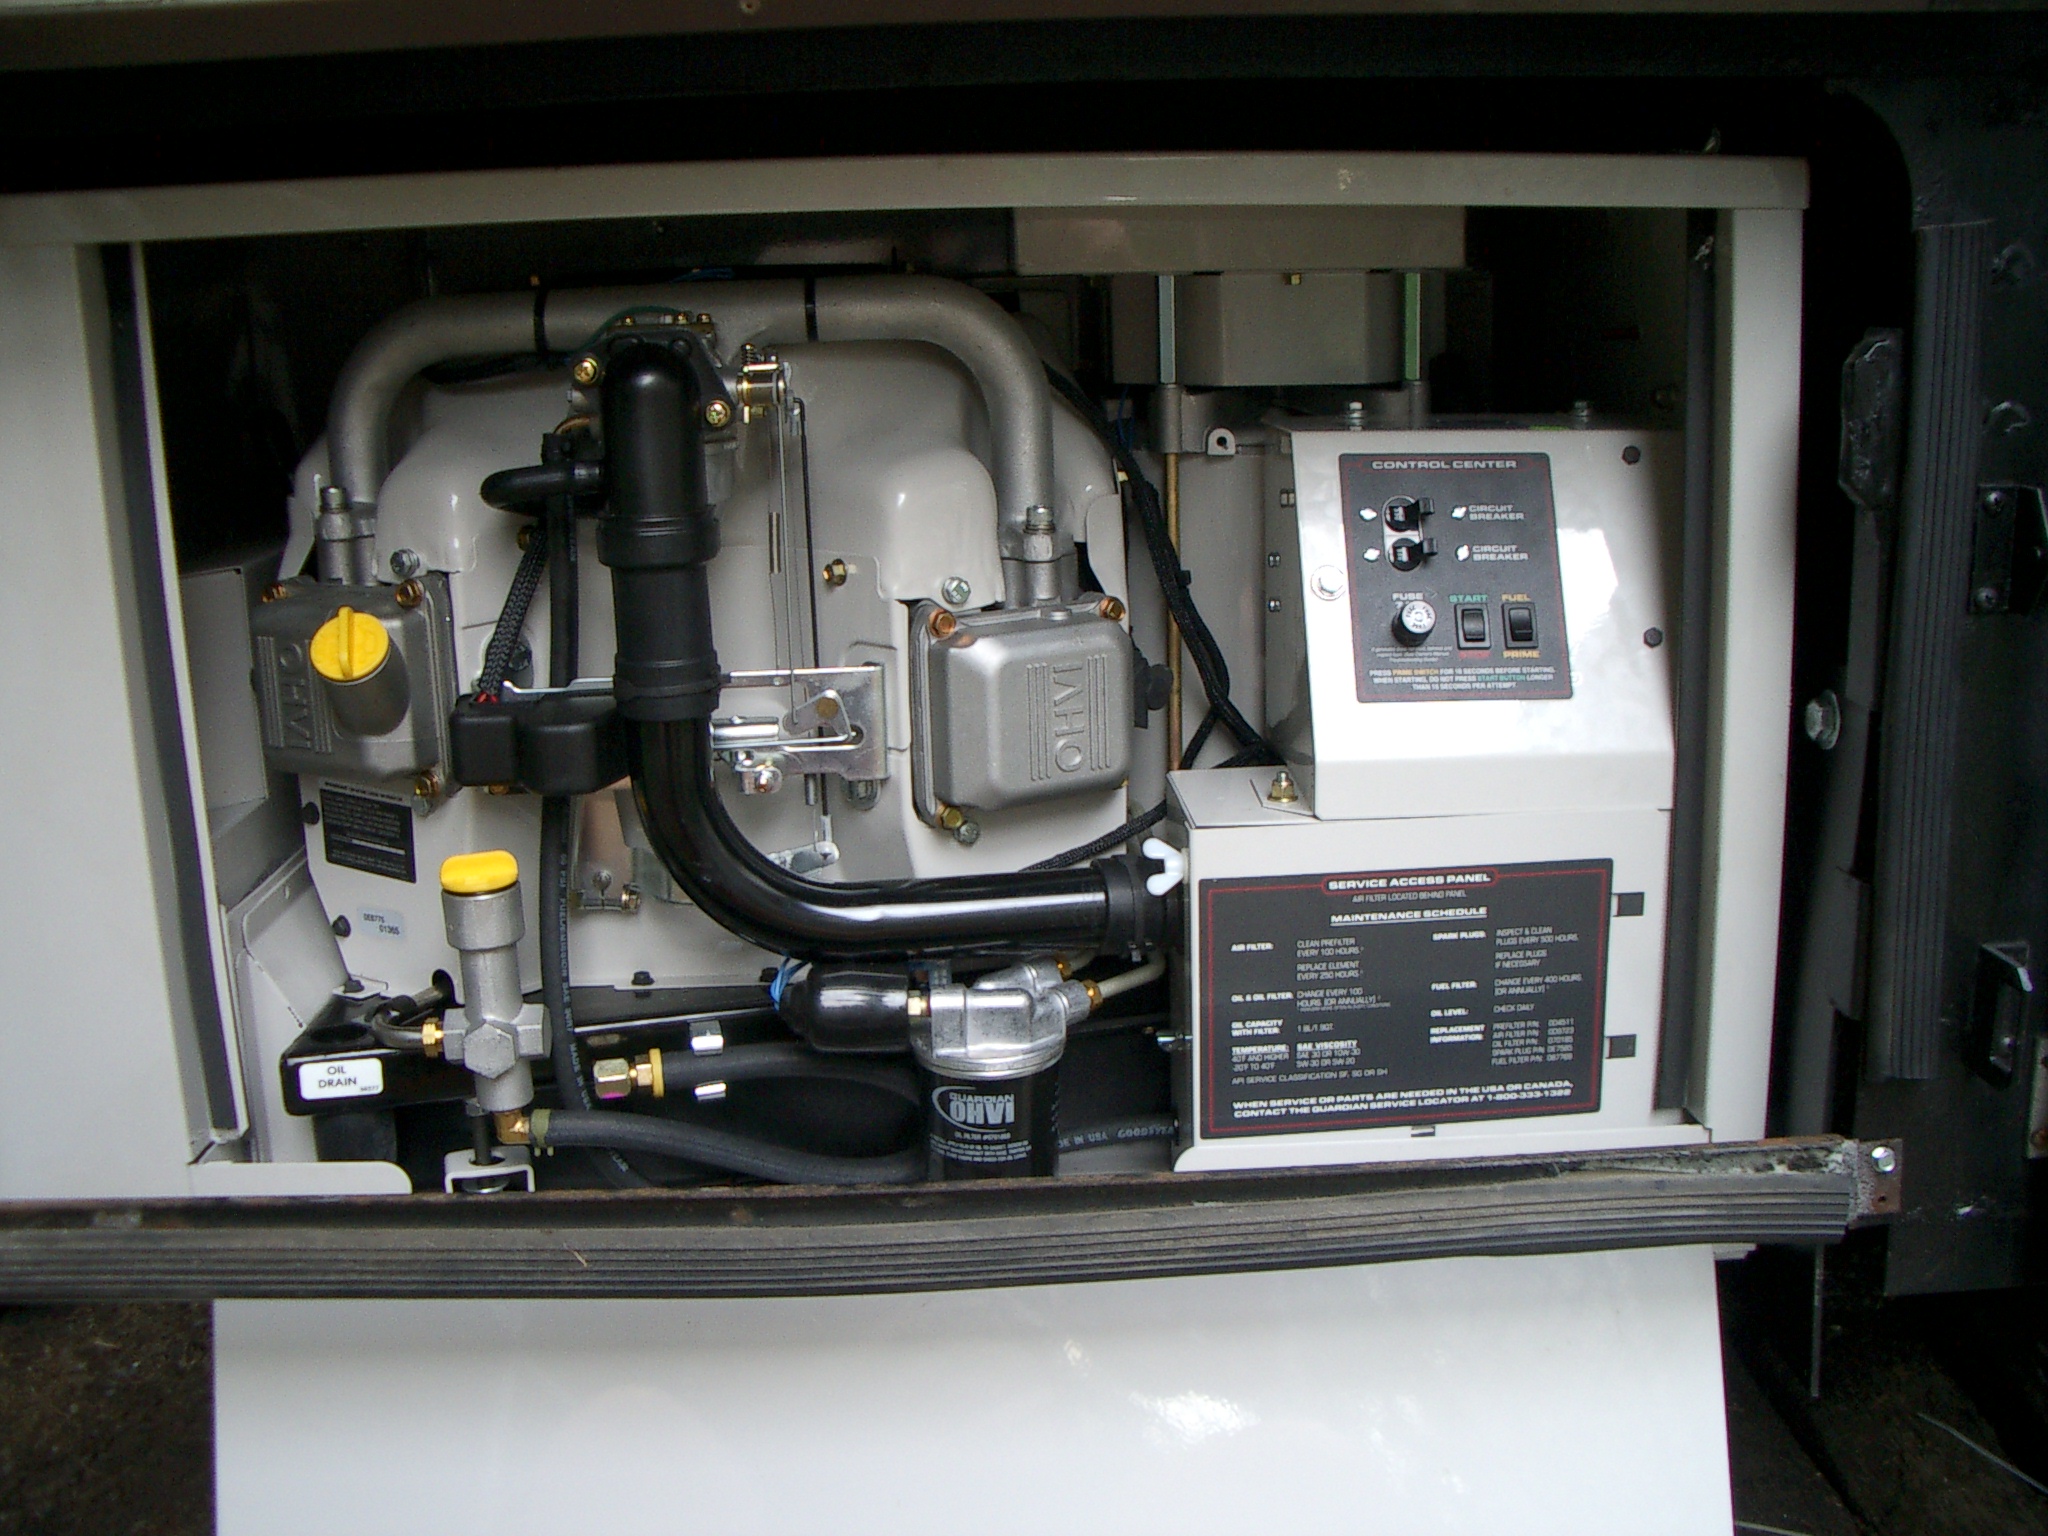
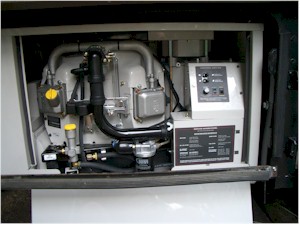
This is the generator open. The bar in front of the
compartment is probably not needed and it may be removed. The steel plates
provide a good deal of support for the panels. A small screw was added
that holds the cover to the box. The black plastic clips, while they
appear capable, just don't seem like they are as capable as an easily removed
screw. These people built in a number of really neat features. Look
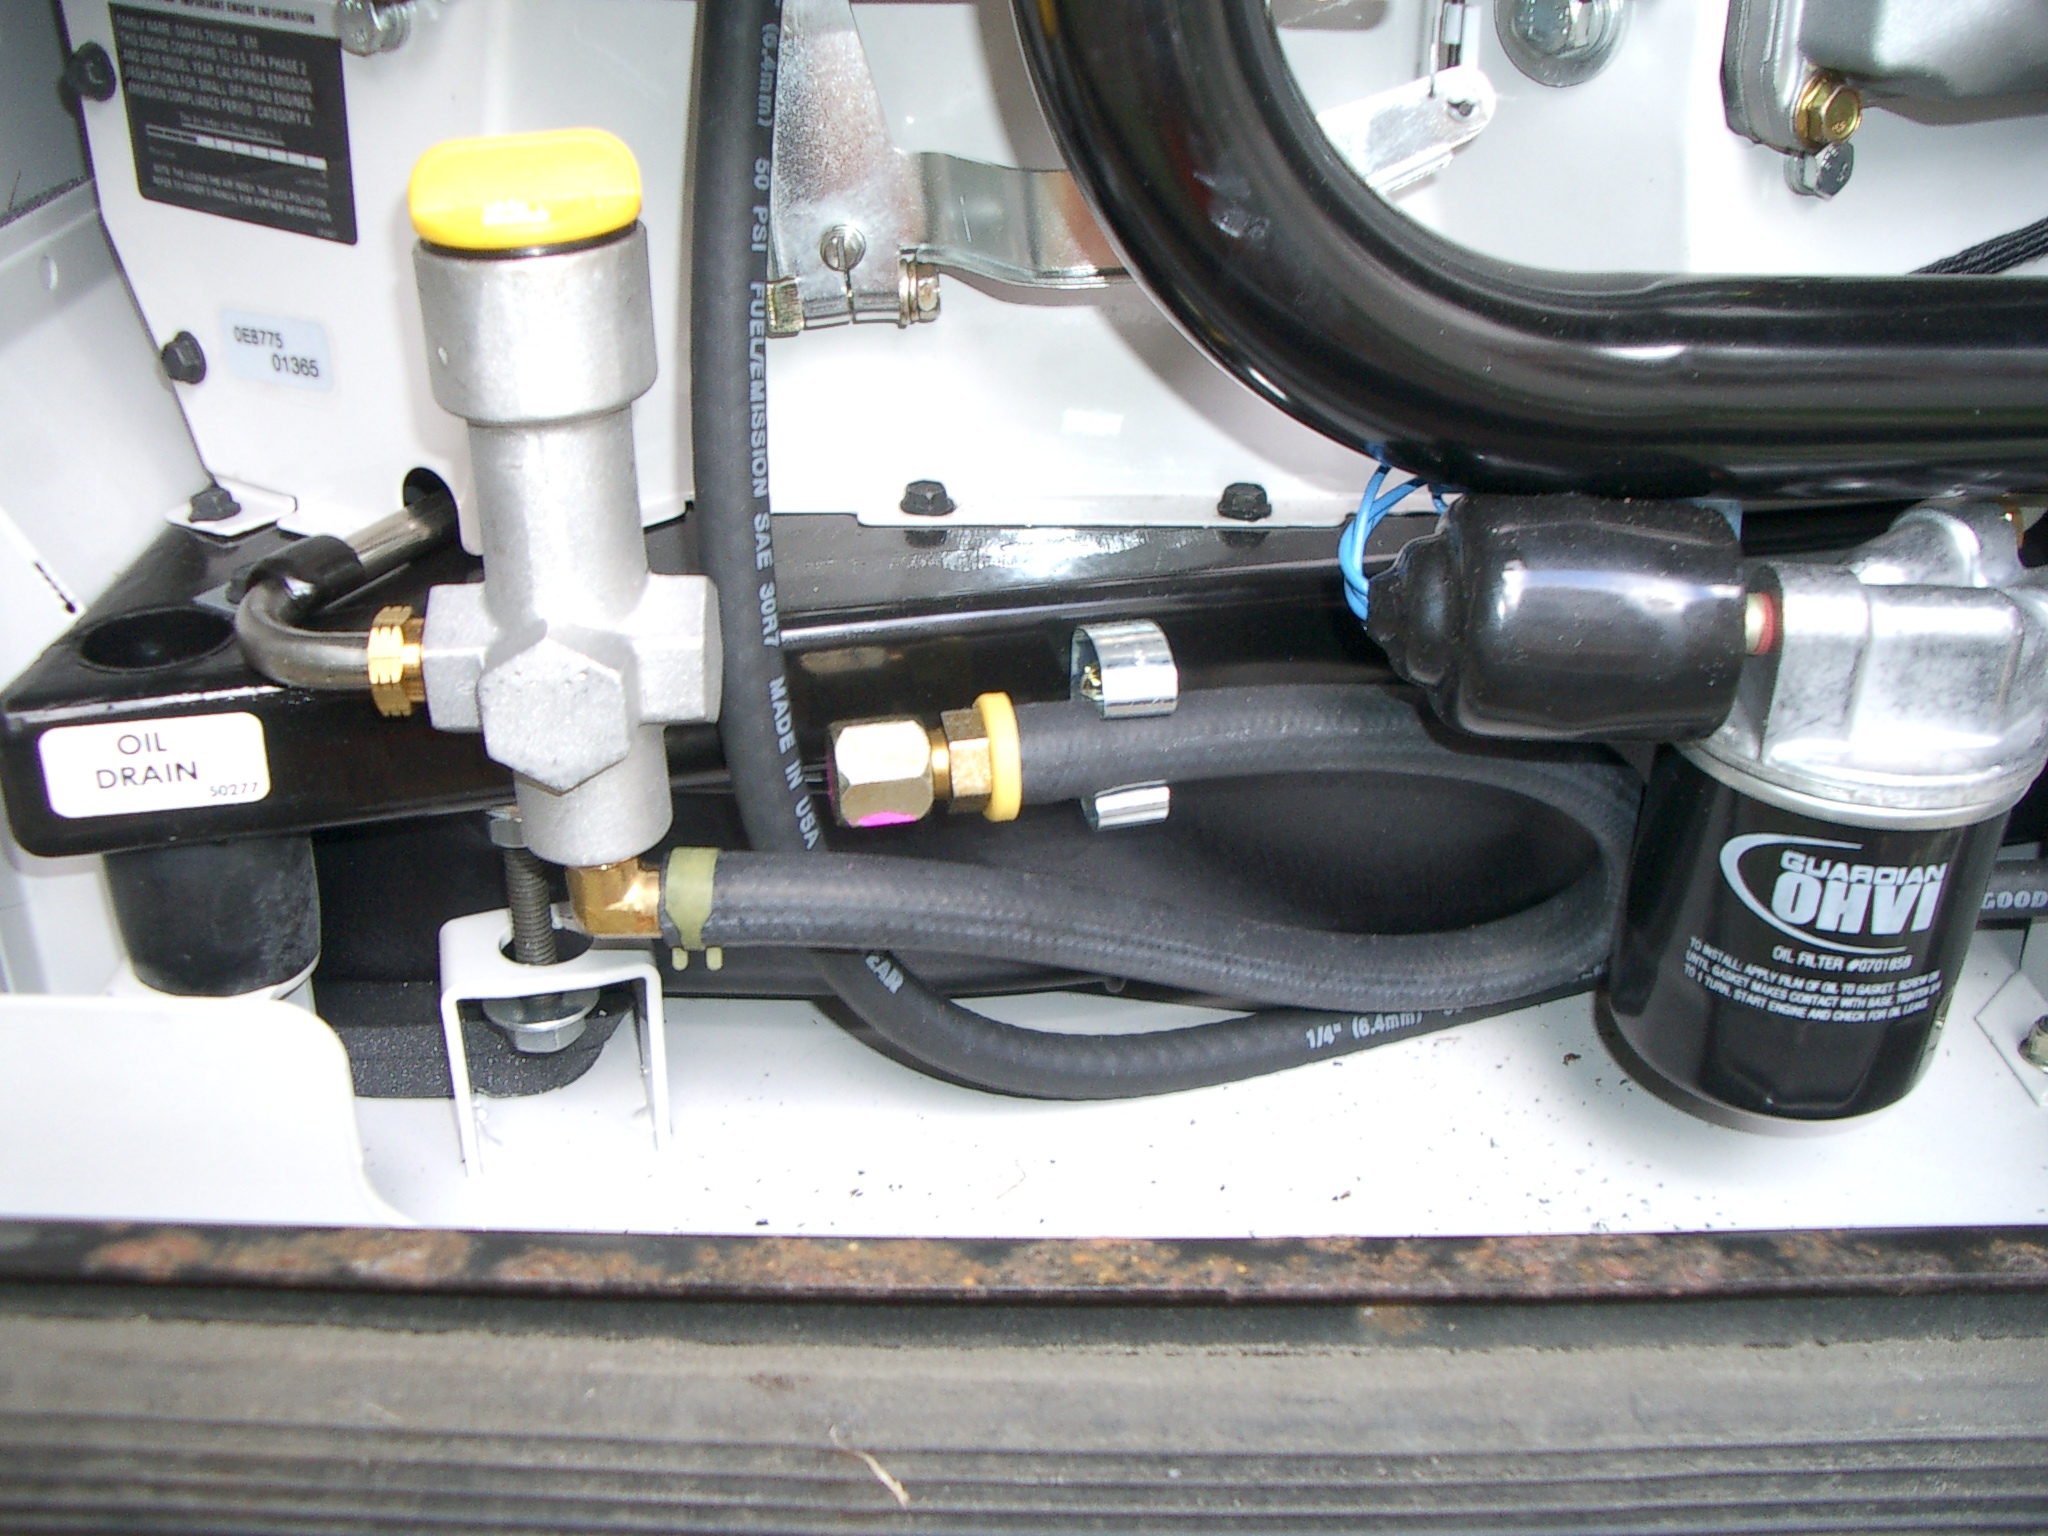
at the picture below right and you'll see the oil change hose. You dump
the oil overboard. Neat stuff.
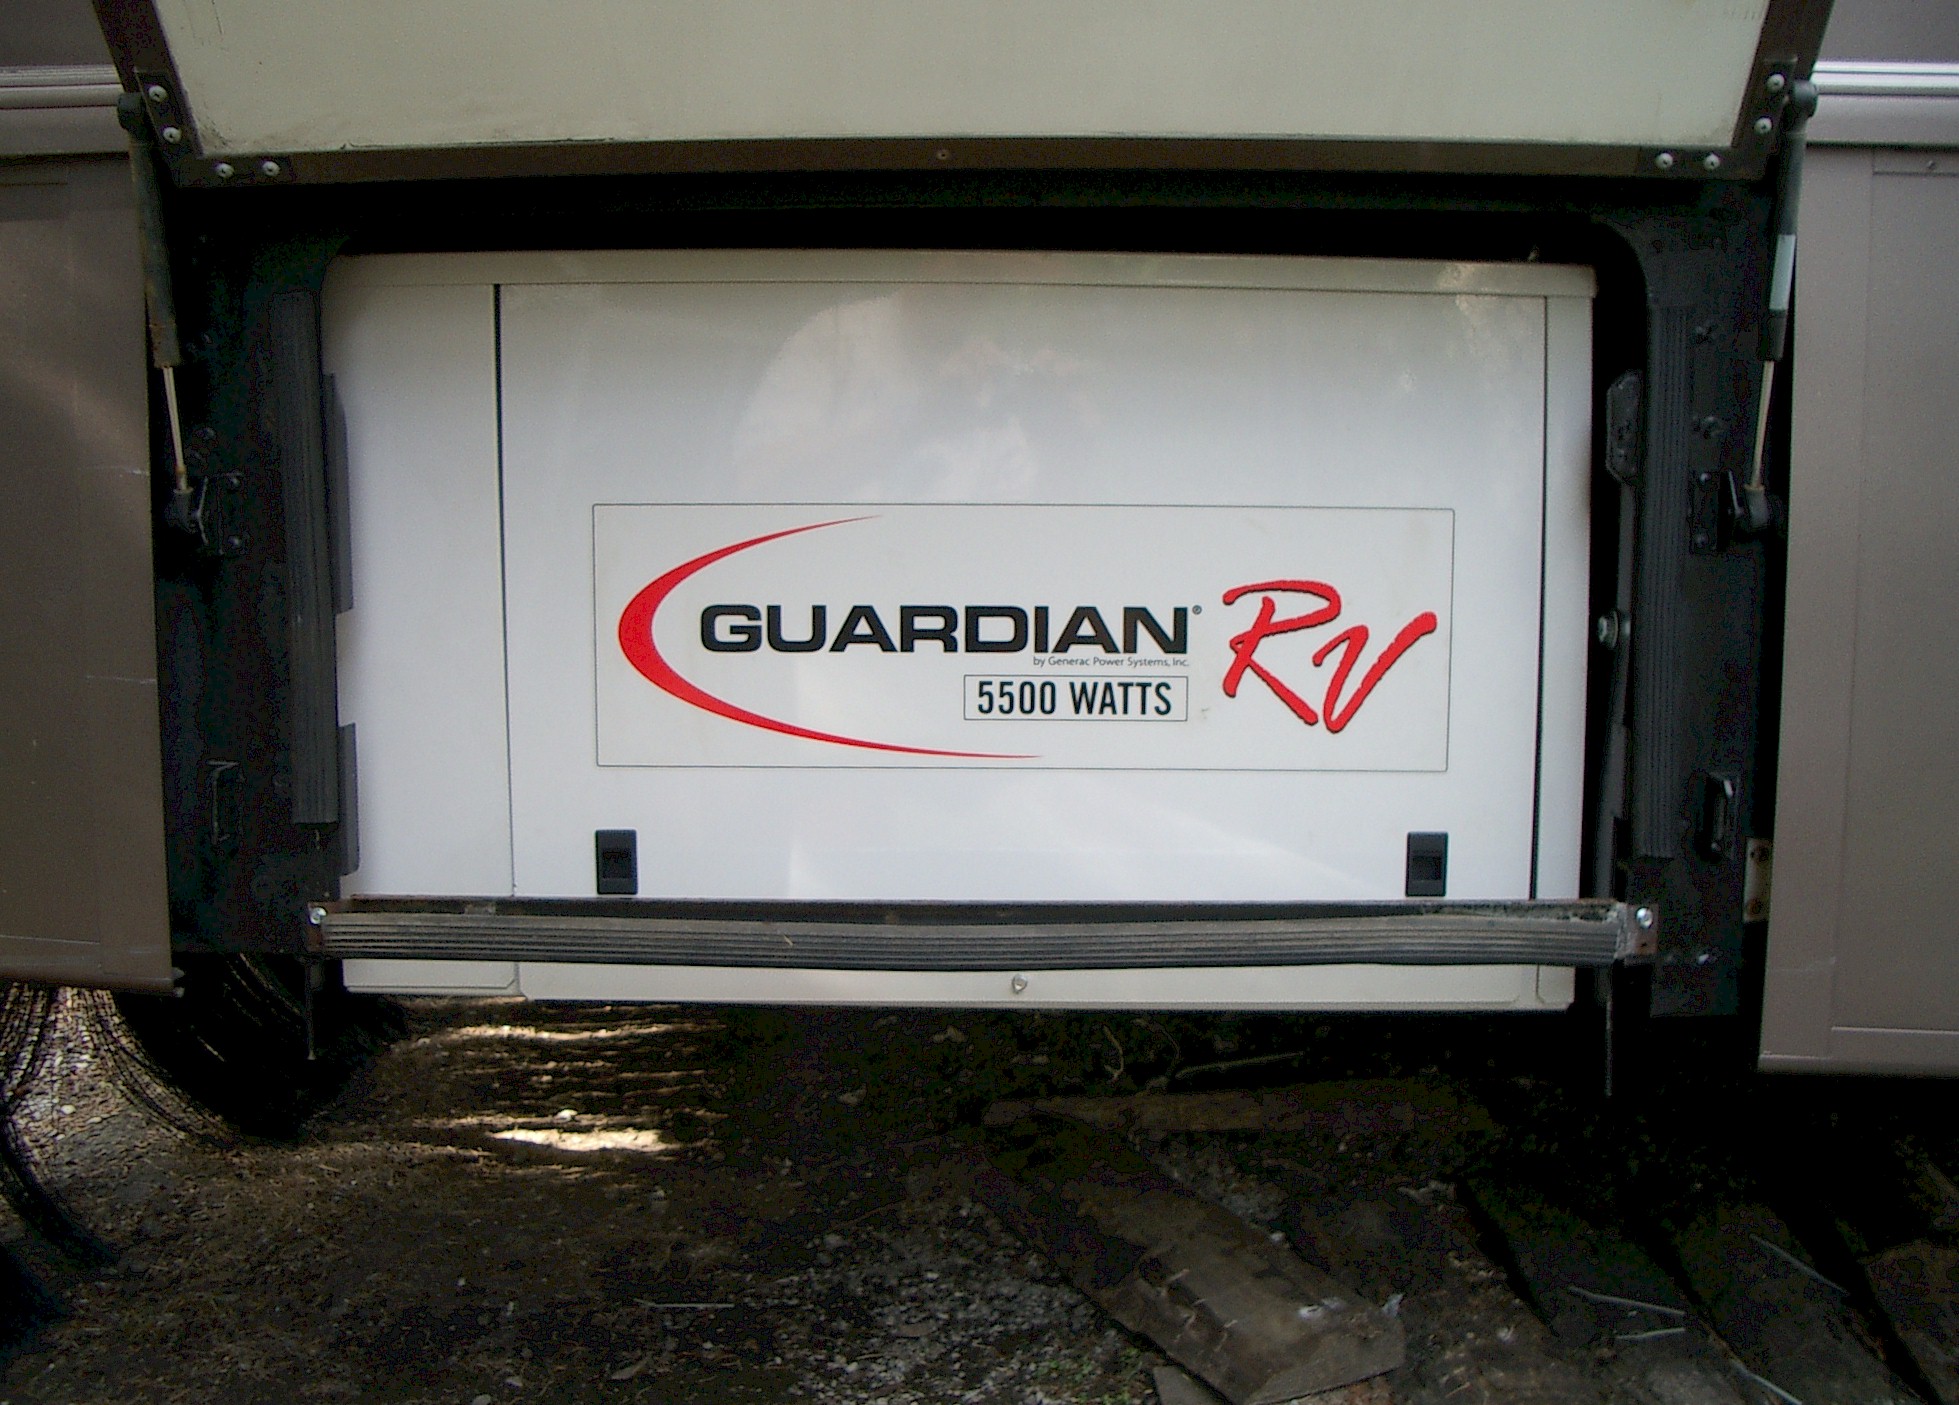
Is the generator quiet? Yes, amazingly so. It is not
as quiet as a 2000 watt Honda but it is also putting out 5,500 watts and is
powered by a 24 horsepower motor. It is using half the gas of the old
generator. Time will tell. For now, it appears to be the absolute
best choice I could have made ... and the cheapest!
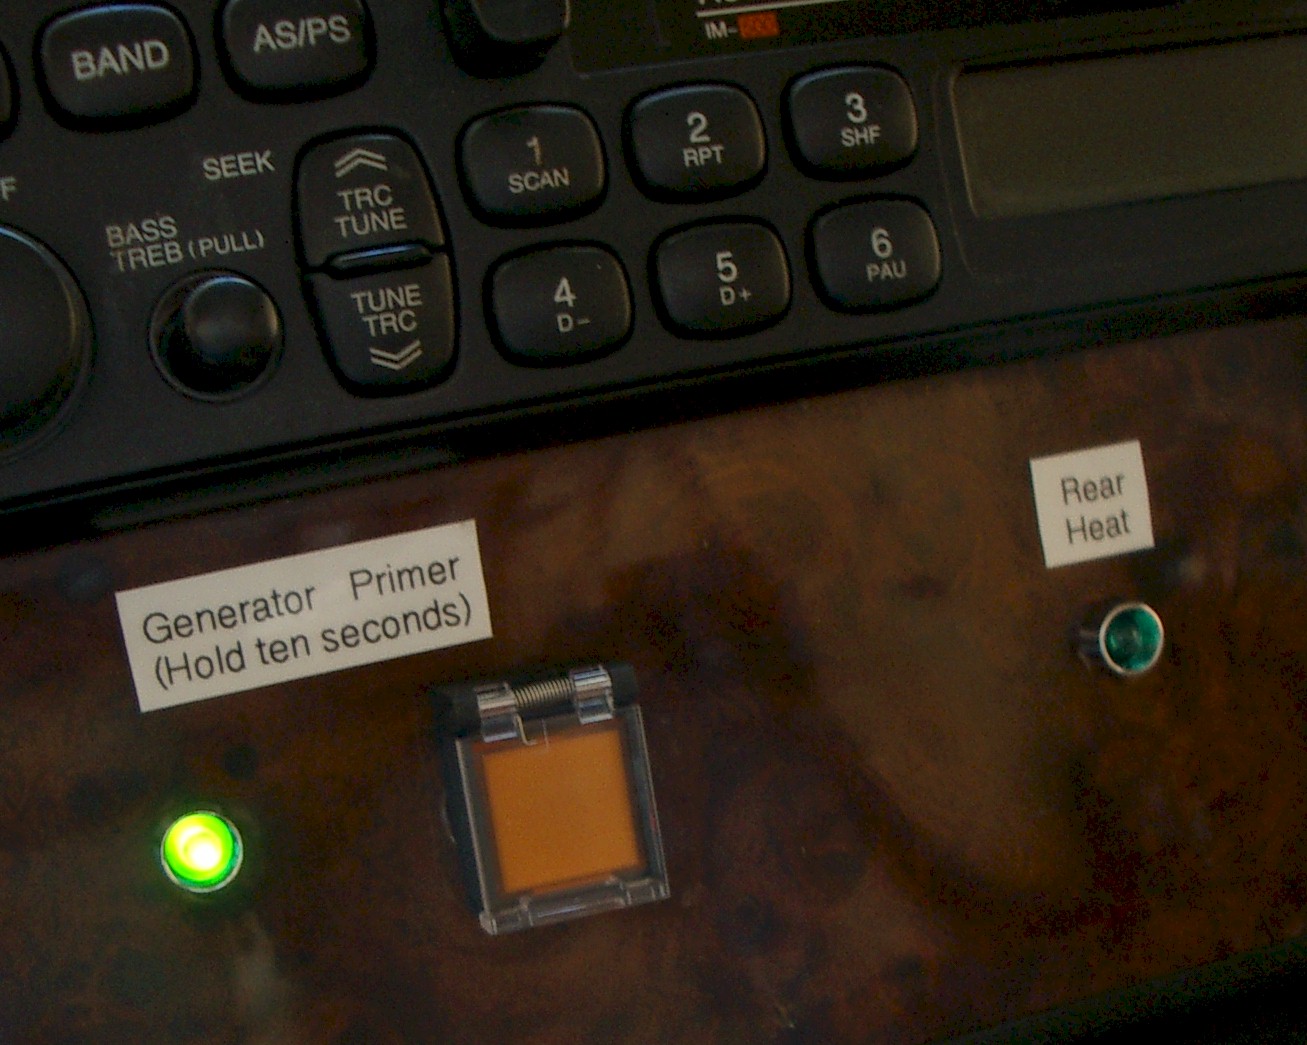
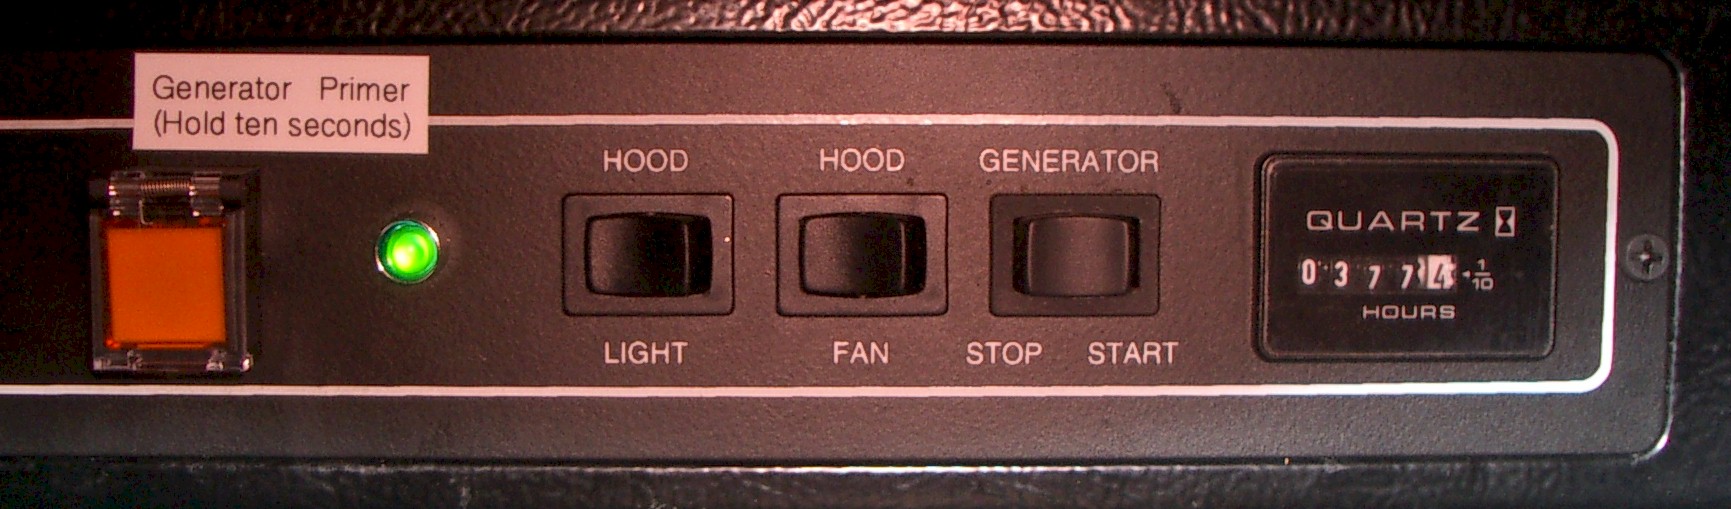
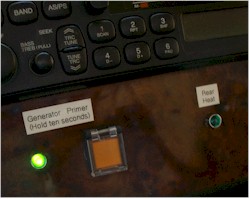 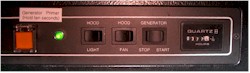 The modifications started almost immediately. While
cranking the generator allowed it to start, like all generators, it took some
time to get fuel to the engine. Generac solves that by including a prime
switch that powers the fuel pump. Hit the prime button for ten seconds and
the generator starts right up. Now knowing how well it works, I'd install
one in any generator. There are four lines coming in for the generator
remote control: start, stop, ground, and a 12 volt generator run wire.
Some checking showed the ground was simply a wire leading to the switch.
It was not grounded anywhere in the line. I took that wire (marked LN on
my Winnie) and made that the prime wire. I put in two prime switches, one
in the panel over the sink and one in the dash. The switches are from
www.mouser.com and have covers so the
switches are protected. I used the 12 volt source for the fan and light
over the sink. In the dash I used the general 12 volt dash line. I
also installed a green LED in each location to indicate when the generator was
running. (This generator is quiet! If the fan is on you don't hear
the generator.) This was placed on the generator run line and to ground.
The old ground, from the switch, was run to a convenient ground in each
location. I also installed a LED indicator to allow me to know when I had
the rear heat on. I used two diodes to each of the "on" lines from the
switch to light the LED. The modifications started almost immediately. While
cranking the generator allowed it to start, like all generators, it took some
time to get fuel to the engine. Generac solves that by including a prime
switch that powers the fuel pump. Hit the prime button for ten seconds and
the generator starts right up. Now knowing how well it works, I'd install
one in any generator. There are four lines coming in for the generator
remote control: start, stop, ground, and a 12 volt generator run wire.
Some checking showed the ground was simply a wire leading to the switch.
It was not grounded anywhere in the line. I took that wire (marked LN on
my Winnie) and made that the prime wire. I put in two prime switches, one
in the panel over the sink and one in the dash. The switches are from
www.mouser.com and have covers so the
switches are protected. I used the 12 volt source for the fan and light
over the sink. In the dash I used the general 12 volt dash line. I
also installed a green LED in each location to indicate when the generator was
running. (This generator is quiet! If the fan is on you don't hear
the generator.) This was placed on the generator run line and to ground.
The old ground, from the switch, was run to a convenient ground in each
location. I also installed a LED indicator to allow me to know when I had
the rear heat on. I used two diodes to each of the "on" lines from the
switch to light the LED.
My first trip out with the new generator
confirmed that it is working well.
My copy of the manual in case I need to refer to
it when on the road
|