Wolf's Motorhome Modifications
... and Other Stuff
Adding Seven Indoor Outdoor Thermometers!
I've added a total of seven indoor/outdoor thermometers: 
Driver's Seat
Adding a thermometer is no big deal. I used Radio Shack brand units that show indoor temperature and humidity and outdoor temperature.
The first is by the driver's seat. I can turn slightly when driving and tell what it's like outside. If you do any winter camping you'll realize that when the thermometer registers 33 degrees and it's raining, you're OK. When the temperature registers 32, the water is going to freeze on the road ... BEWARE! This thermometer is CRITICAL.
First set the screws you're going to use to hold the thermometers in place.
 The outside probe is on a long, two conductor wire. I snip the wire and
remove virtually all the extra leaving just enough to allow the probe to be poked through
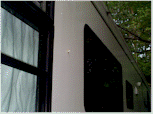
a hole to the outside. I drill a hole the same size as the probe. So far on
the first try I have made it through without hitting a steel reinforcement. Take
some GOOP adhesive on a cue tip and seal the inside of the hole. In this way the
inside wall of the hole is sealed. Use the wet GOOP as a lubricant and poke the
probe through until just about half is sticking out of the hole. Set the unit on the
screws.
Take a small bit of GOOP and seal around the outside of the probe.
Why I use GOOP
I've tried many brands of sealant. The best is a brand called Acryl-R-Seal. However, that won't work well with vertical installations. Silicone works well if you buy the BEST. I've had good luck with GE's most expensive product. However, nothing beats GOOP for sealing motorhome mods. It will seal tight and last the life of the unit. As it's an adhesive, it holds things in place. You can get away with silicone for a few years but do it right and use GOOP.
Rear Bedroom
This one was situated on the opposite side of the motorhome. It allows me to see what the temperature if the sun is on the other one. It also is nice to know what to wear in the morning.
Installation is identical to the one behind the driver's seat.
Water Storage Part of the Basement, Holding Tank Basement Area and Bedroom
Being winter campers, keeping things warm becomes critical. The Winnie has a basement heater that helps when moving. When stationary, a heater is needed. Rather than guess about how much heat is enough, installing a probe by the pump and tank gives you the data you need.
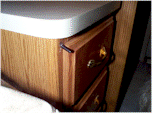
These thermometers have a small mounting cup. I scrapped away the two sided tape (it won't hold over time) and used two tiny flat headed screws to mount the cup. I predrilled the cup with a Dremel tool and scratched a pilot hole through the hard outer layer of wood. Again, a bit of GOOP will help the screws hold the cup.
In this installation I simply added more wire to the probe and ran it behind, around and through and back to the area of the tank. I don't like solid conductor wire and try to use stranded wire whenever possible. I used some Radio Shack 24 gauge speaker wire for the added length. There is no need to solder the connections, just twist them together and use tape. Use a good brand of tape, like Scotch 33+. Cheap tape comes apart after a few years.
The thermometer is the smaller Radio Shack version that allows you to switch between inside and outside. This thermometer stays on "outside" all the time.
 I installed a probe in the bedroom. I have control of the rear heat
from the driver's seat. Leaving someone cooking or freezing in the back while
driving leads to a very cranky relief driver. The probe needs to be mounted at the
level of the bed. There can be a major heat differential between the floor and the
ceiling.
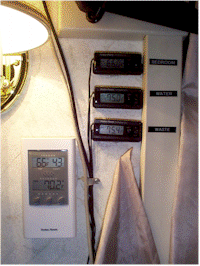
These three thermometers are all visible from the driver's seat and are shown in the picture at the top of the page.
Refrigerator and Freezer Thermometers

 I sure wish I knew why RV fridge manufacturers don't offer
an outside thermometer as standard equipment. Being able to actually tell what the
temperature is inside your fridge and freezer is often critical.
As with the other thermometers, you install these by mounting them
first and then drilling a small hole into the refrigerator and the freezer. Again,
you seal with some GOOP. Like above, you must remove the two sided tape and screw
the 
 mounting cup to the door. I used some GOOP there, too, to help hold the
mounting cup on. The hole was drilled behind the thermometer.
Why guess if your fridge is working right? 20 minutes of work will let you know for sure!