|
Wolf's Motorhome Modifications ... and Other Stuff Replacing a Radiator Fan Replacing the Brake Fluid
Brake fluid is hydroscopic; it attracts water and that water lowers the boiling point of the fluid. The fluid is under very high pressure and will boil if not up to snuff. With a few problems I had with a prior caliper replacement, I was sure a new batch of fluid would fix the problem.
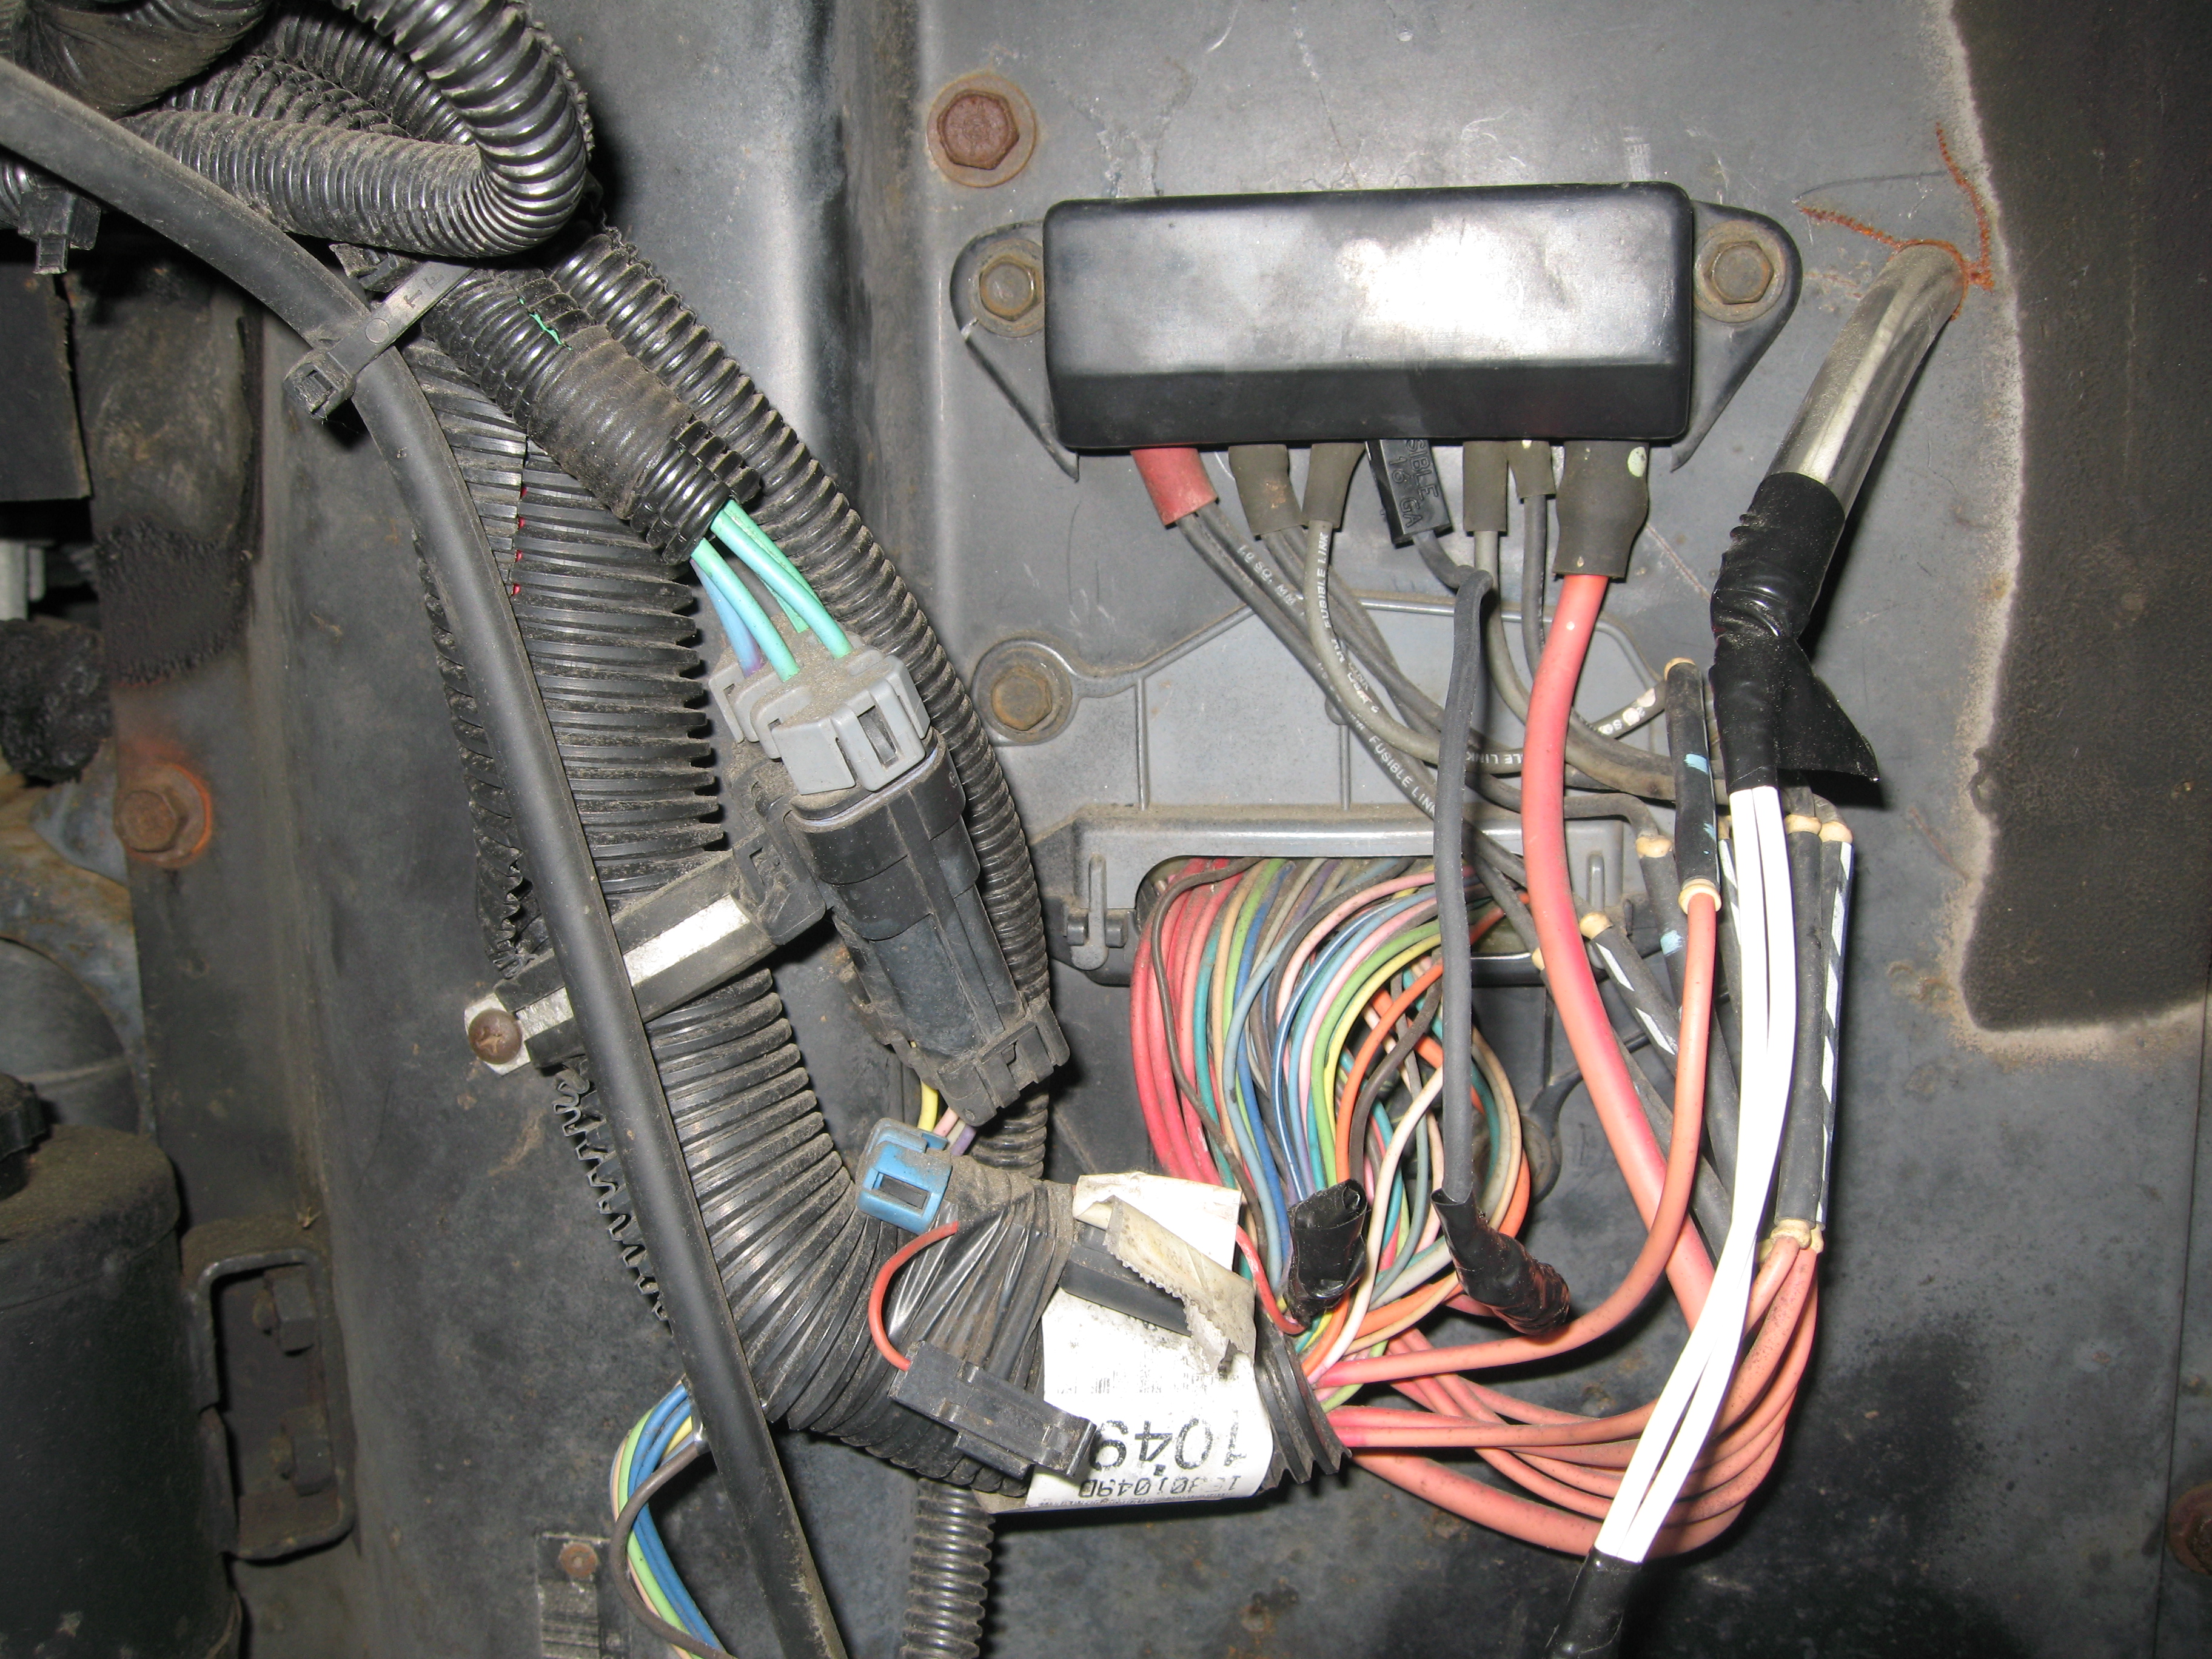
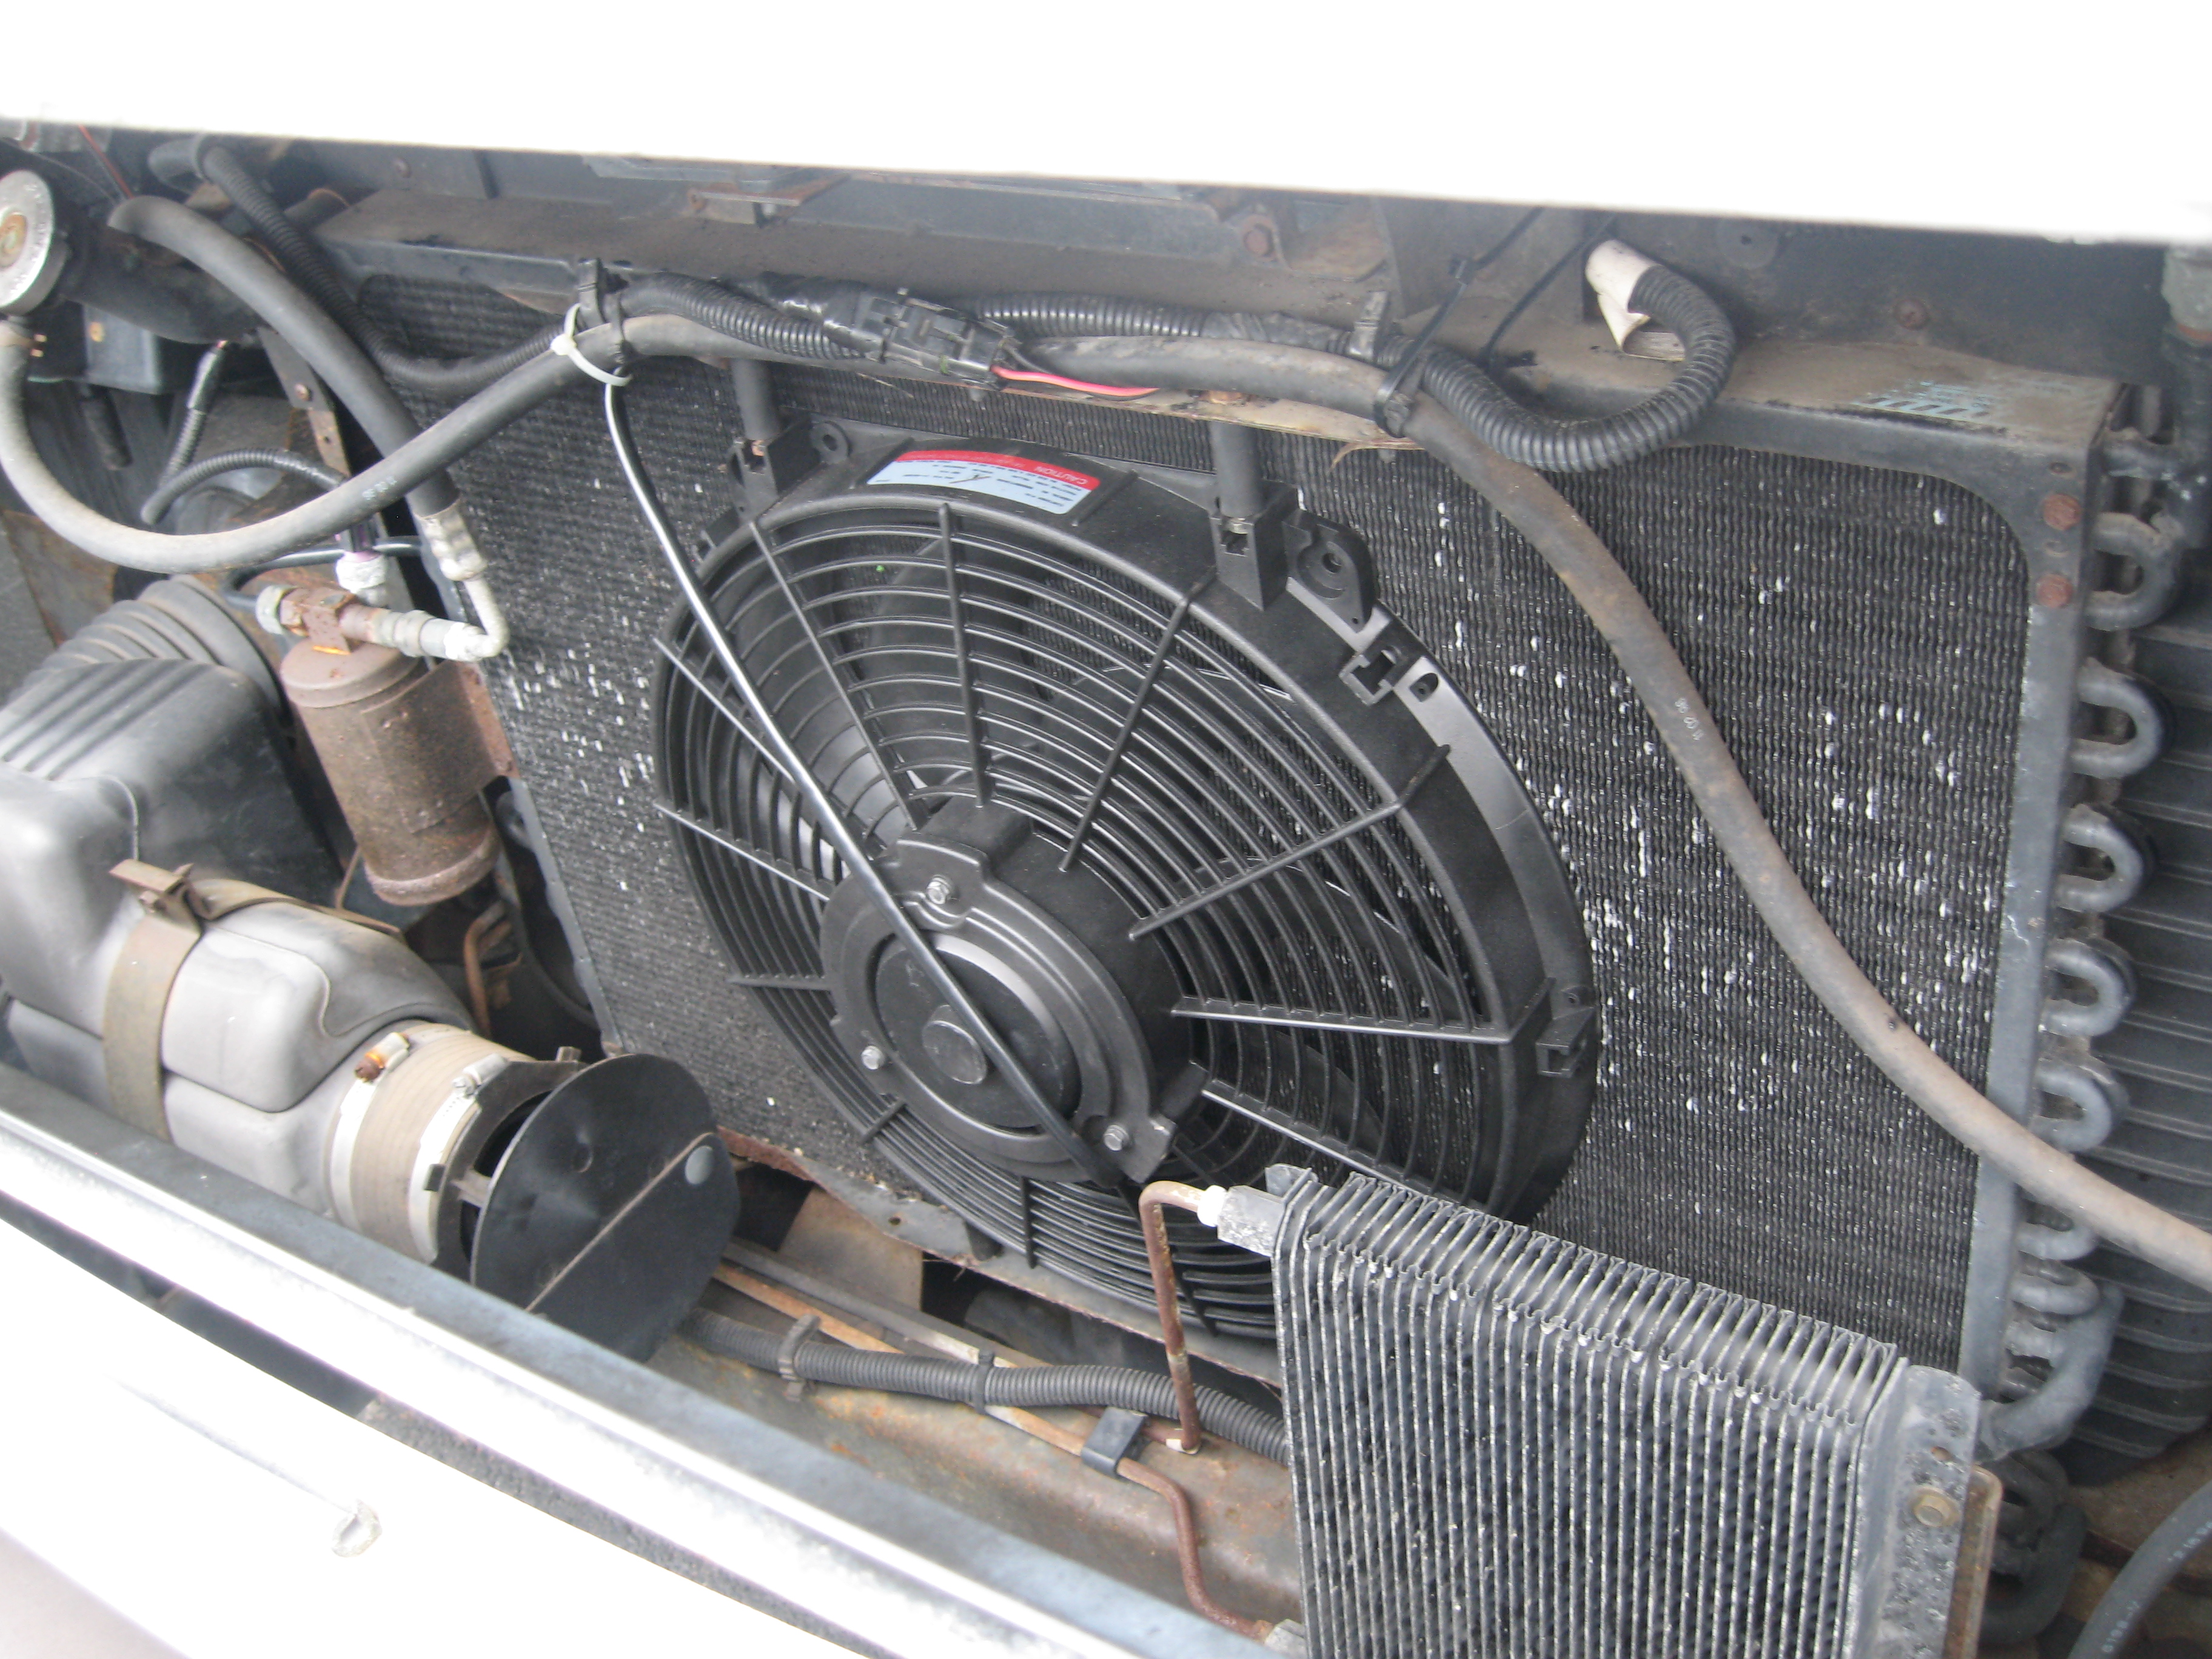
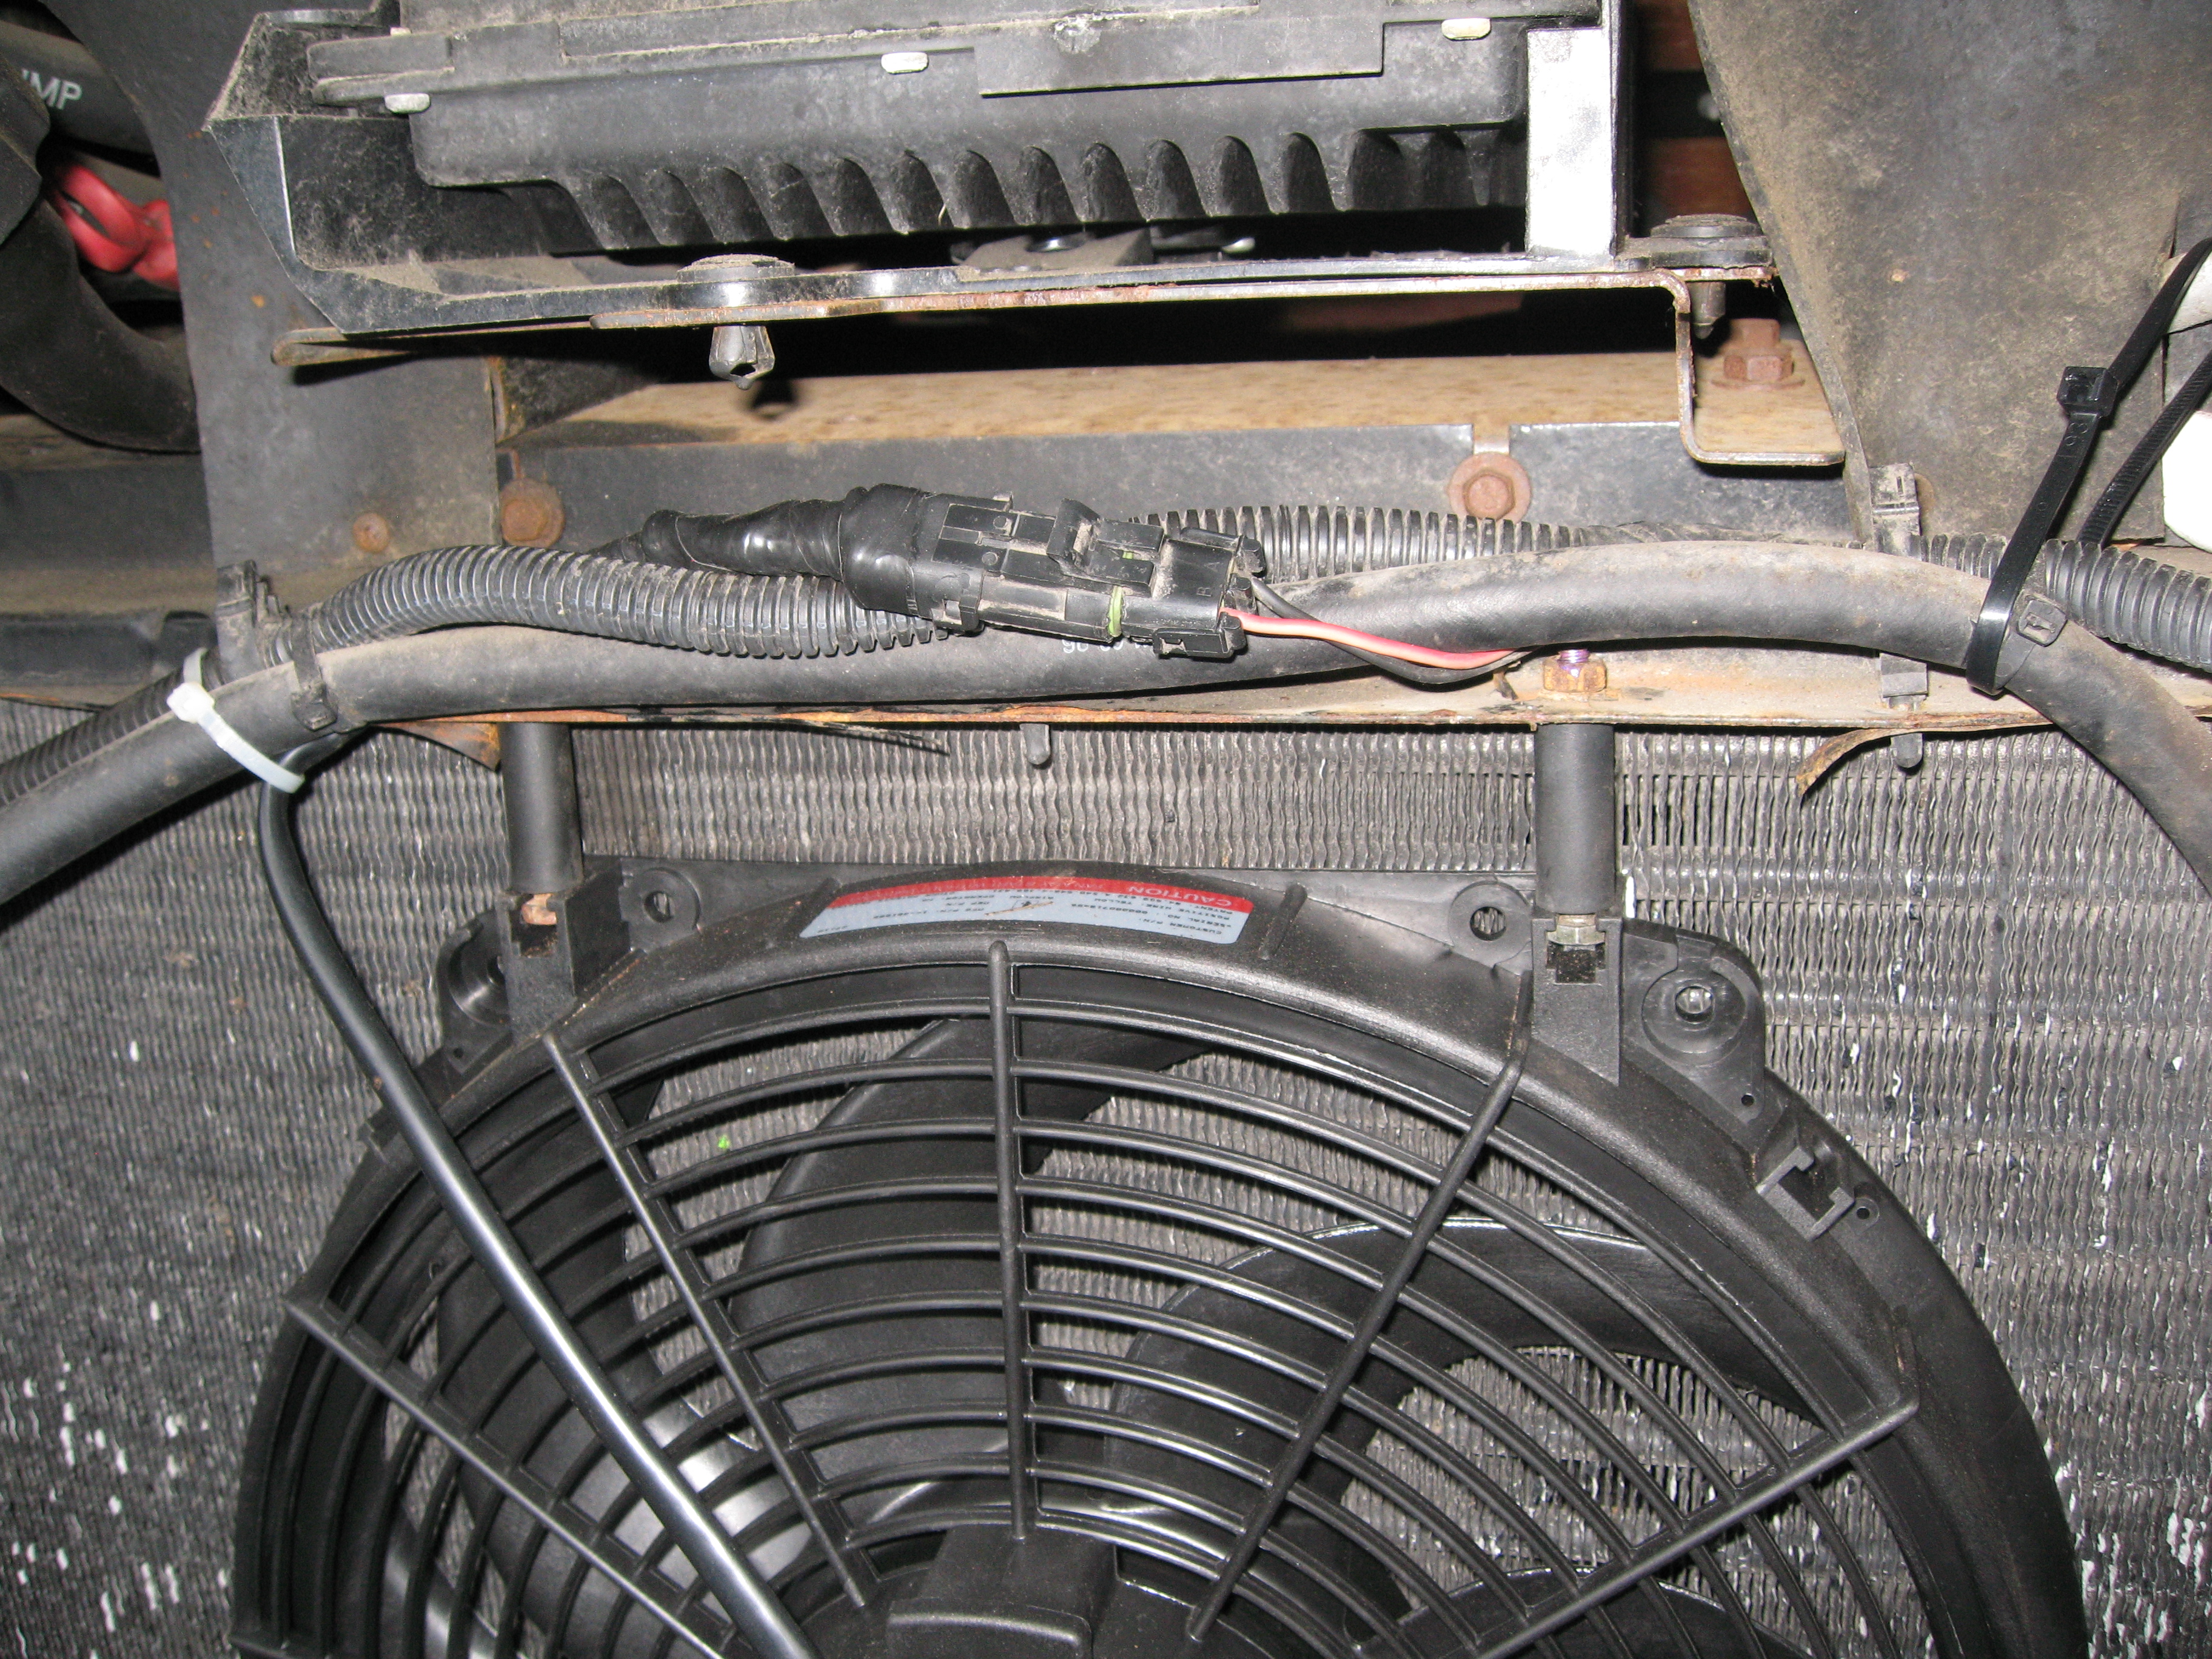
But what of that burned through fusible link? Turns out that link powered the electric radiator fan. That fan comes on to assist in the cooling of the radiator when two events occur. It comes on with the air conditioning and it comes on when a temperature sensor on the engine signals high heat. My fan had failed badly. Really badly. It must have gone to a direct short as the connector on the fan showed it had suffered some high temperatures. The manual said I should see about five ohms across the motor. I showed a dead short. As of June of 2011, Advanced Auto Parts (on-line or at your local store) has a replacement. Their part number is Hayden part number 226116. Search for "radiator fan imperial". The cost was about $74 and tax. My thanks to Dick Garlapow from Buffalo who put this information on the Yahoo P-30 motorhome group ( http://autos.groups.yahoo.com/group/MotorhomesP-30GM/ ). Unbolt the old fan, throw in the new. I replaced the fusible link with another 1 mm square, 16 gauge link I bought from NAPA.
I haven't used my air since it failed many years ago. The roof airs work so much better and don't load the engine in hot weather. So turning the air on didn't work. I'd have to heat the engine up. Rather than do that, I located the fan relay. It is under the dash, mounted on a plate with a number of other relays. There are but red, pink and a single, smaller green wire coming from the relay socket. Power comes from the fusible link to the relay. Out of the relay is the green wire. If either switch puts that green wire to ground, the fan comes on. I pulled back a bit of insulation on the green wire, jumped it to ground and insured the fan is working. Wait. It ain't working. Turns out I had to clean the connector above the fan with a small Dremel tool bit to clean up the connector. Fan works. Later, I checked in hot weather and high engine temperatures. The fan is working. The Brake Fluid Replacing the brake fluid was a learning experience. I was counseled to either use a pressure or vacuum pump to change the fluid. I'm glad I started with a vacuum pump, but in the end, neither is necessary. The pressure method requires one to modify another brake fluid reservoir lid to take a port into which brake fluid can be inserted using a small garden sprayer. Opening the bleeder on each cylinder then allows you to pressure the fluid through. The vacuum method required a small vacuum pump (about $25 from Harbor Freight) suck fluid from the bleeder. I'm not sure a pressure bleeder system would work well. The reservoir is not really made to be pressurized. I suppose a device could somehow clamp over the space where the lid goes, but that'd be a lot of work. If you never did this before, starting with the vacuum pump is recommended. You can suck out just as much as you want, insuring that the brake master cylinder doesn't go dry. If the brake master cylinder goes dry, you have to re-prime that device and that requires cracking the brake lines. I never let mine go dry. Never had to re-prime because I was able to monitor what was coming out the bleeders and run back to refill the reservoir. It seemed to many on the lists that it was very important to bleed the right rear first, then the left rear, right front and then left front. The theory was that you should start from the furthest distance. Sort of. The brake fluid reservoir has two tanks, one for the front and one for the back. You can bleed the back all day long and never take fluid from the front tank. A number on the list didn't know about that and that made me suspect their experience. Sometimes people go to wiki, learn what is there and then regurgitate it on the listserve. Not what I want! I want someone who has been under the motorhome, cranking the bleeders open. Someone with brake fluid on their hands. I started on the right rear. I opened the bleeder and hooked up my vacuum pump. I pumped a bit out, as the cylinder attached to the vacuum pump was quite small. Dumped that out. Checked the reservoir. Pumped more out. Dumped, checked, refill, pump, dump, check, refill, pump ... and on and on and on. It took a lot of fluid until the maple syrup-looking fluid changed to nice clear new stuff. I moved to the left rear, then front right and finally the driver's wheel. I went through two one quart bottles and a smaller pint bottle. Oh ... and I changed my tactics. Instead of using the vacuum pump I found a couple of cycles on the brake pedal filled the small bleeder bottle up much faster. Once I could tell how fast fluid would move from the master cylinder reservoir, I was comfortable using the much more efficient brake pedal method. |